Dcat Admin 应用自定义排序规则 作者: Shine 时间: 2025-07-04 分类: PHP 评论 > 为了后续方便查找,故作记录 ❌ 起初我一直以为是这样配置,如果是这样配置,其实是会被 ` parent::get($model);` 里面的方法重置掉排序 ```php <?php namespace App\Admin\Repositories; use App\Models\Operation\RecommendedApp as Model; use Dcat\Admin\Grid; use Dcat\Admin\Repositories\EloquentRepository; class RecommendAppRepo extends EloquentRepository { /** * Model. * * @var string */ protected $eloquentClass = Model::class; public function get(Grid\Model $model) { $model->where('type', 0); $this->addOrderBy($model, 'is_active', 'desc', 'int'); $this->addOrderBy($model, 'order', 'asc', 'int'); return parent::get($model); } } ``` ✅ 其实正确的应该是这样配置 ```php <?php namespace App\Admin\Repositories; use App\Models\Operation\RecommendedApp as Model; use Dcat\Admin\Grid; use Dcat\Admin\Repositories\EloquentRepository; class RecommendAppRepo extends EloquentRepository { /** * Model. * * @var string */ protected $eloquentClass = Model::class; public function get(Grid\Model $model) { $model->where('type', 0); $this->setSort($model); $this->setPaginate($model); // 写到这里 $query = $this->newQuery() ->orderByDesc('is_active') ->orderBy('order'); if ($this->relations) { $query->with($this->relations); } return $model->apply($query, true, $this->getGridColumns()); } } ```
使用 `asr restore` 命令进行 macOS 数据迁移:从 `/Volumes/Data` 到新磁盘 作者: Shine 时间: 2025-06-23 分类: macOS 评论 在日常使用 Mac 的过程中,我们可能会遇到以下几种场景: - 更换硬盘或 SSD,希望把现有系统完整迁移过去 - 制作可引导的 Hackintosh 安装磁盘 - 备份系统到另一块磁盘作为镜像 - 将 macOS 环境复制到另一台设备进行快速部署 这些场景都有一个共性:**希望高效、准确地迁移整个磁盘内容(包括系统文件、权限、引导信息等)**。而 macOS 自带的 `asr`(Apple Software Restore)命令,正是为此而生的。 --- ## 为什么不用拖文件的方式迁移? 虽然可以手动拖动文件、使用 `rsync` 或 `ditto` 等命令来迁移数据,但这些方法存在局限: - 无法迁移隐藏的系统文件和符号链接 - 权限和 ACL 可能丢失 - 文件级拷贝在大量小文件场景下效率低 - 无法制作可引导的系统盘 相比之下,`asr` 提供了**块级恢复(block-level restore)**,效率高、还原精准,是迁移系统盘或完整磁盘的首选工具。 --- ## 什么是 `asr restore`? `asr` 是 macOS 自带的命令行工具,全称 Apple Software Restore。常用来从磁盘镜像或另一个卷中恢复内容到目标磁盘。 基本语法如下: ```bash sudo asr restore --source /Volumes/源卷名 --target /Volumes/目标卷名 --erase ```` 参数说明: * `--source`:源卷路径(可以是挂载的磁盘或 `.dmg` 镜像) * `--target`:目标卷路径 * `--erase`:表示**清空目标卷**,使用块级恢复(更快、更精准) --- ## 实战命令 假设我有一个名为 `Data` 的卷(已安装好 macOS),现在我想把它完整迁移到另一块磁盘(挂载名为 `New-Hcakintosh`),可以使用以下命令: ```bash sudo asr restore --source /Volumes/Data --target /Volumes/New-Hcakintosh --erase ``` 执行后,系统会提示确认清除目标磁盘,并将 `Data` 的全部内容(包括隐藏文件、系统文件、EFI 引导等)克隆到目标磁盘。 > ⚠️ 注意:`--erase` 会清空目标磁盘,请确保没有重要数据! 整个迁移过程非常顺利,没有啥卡壳的 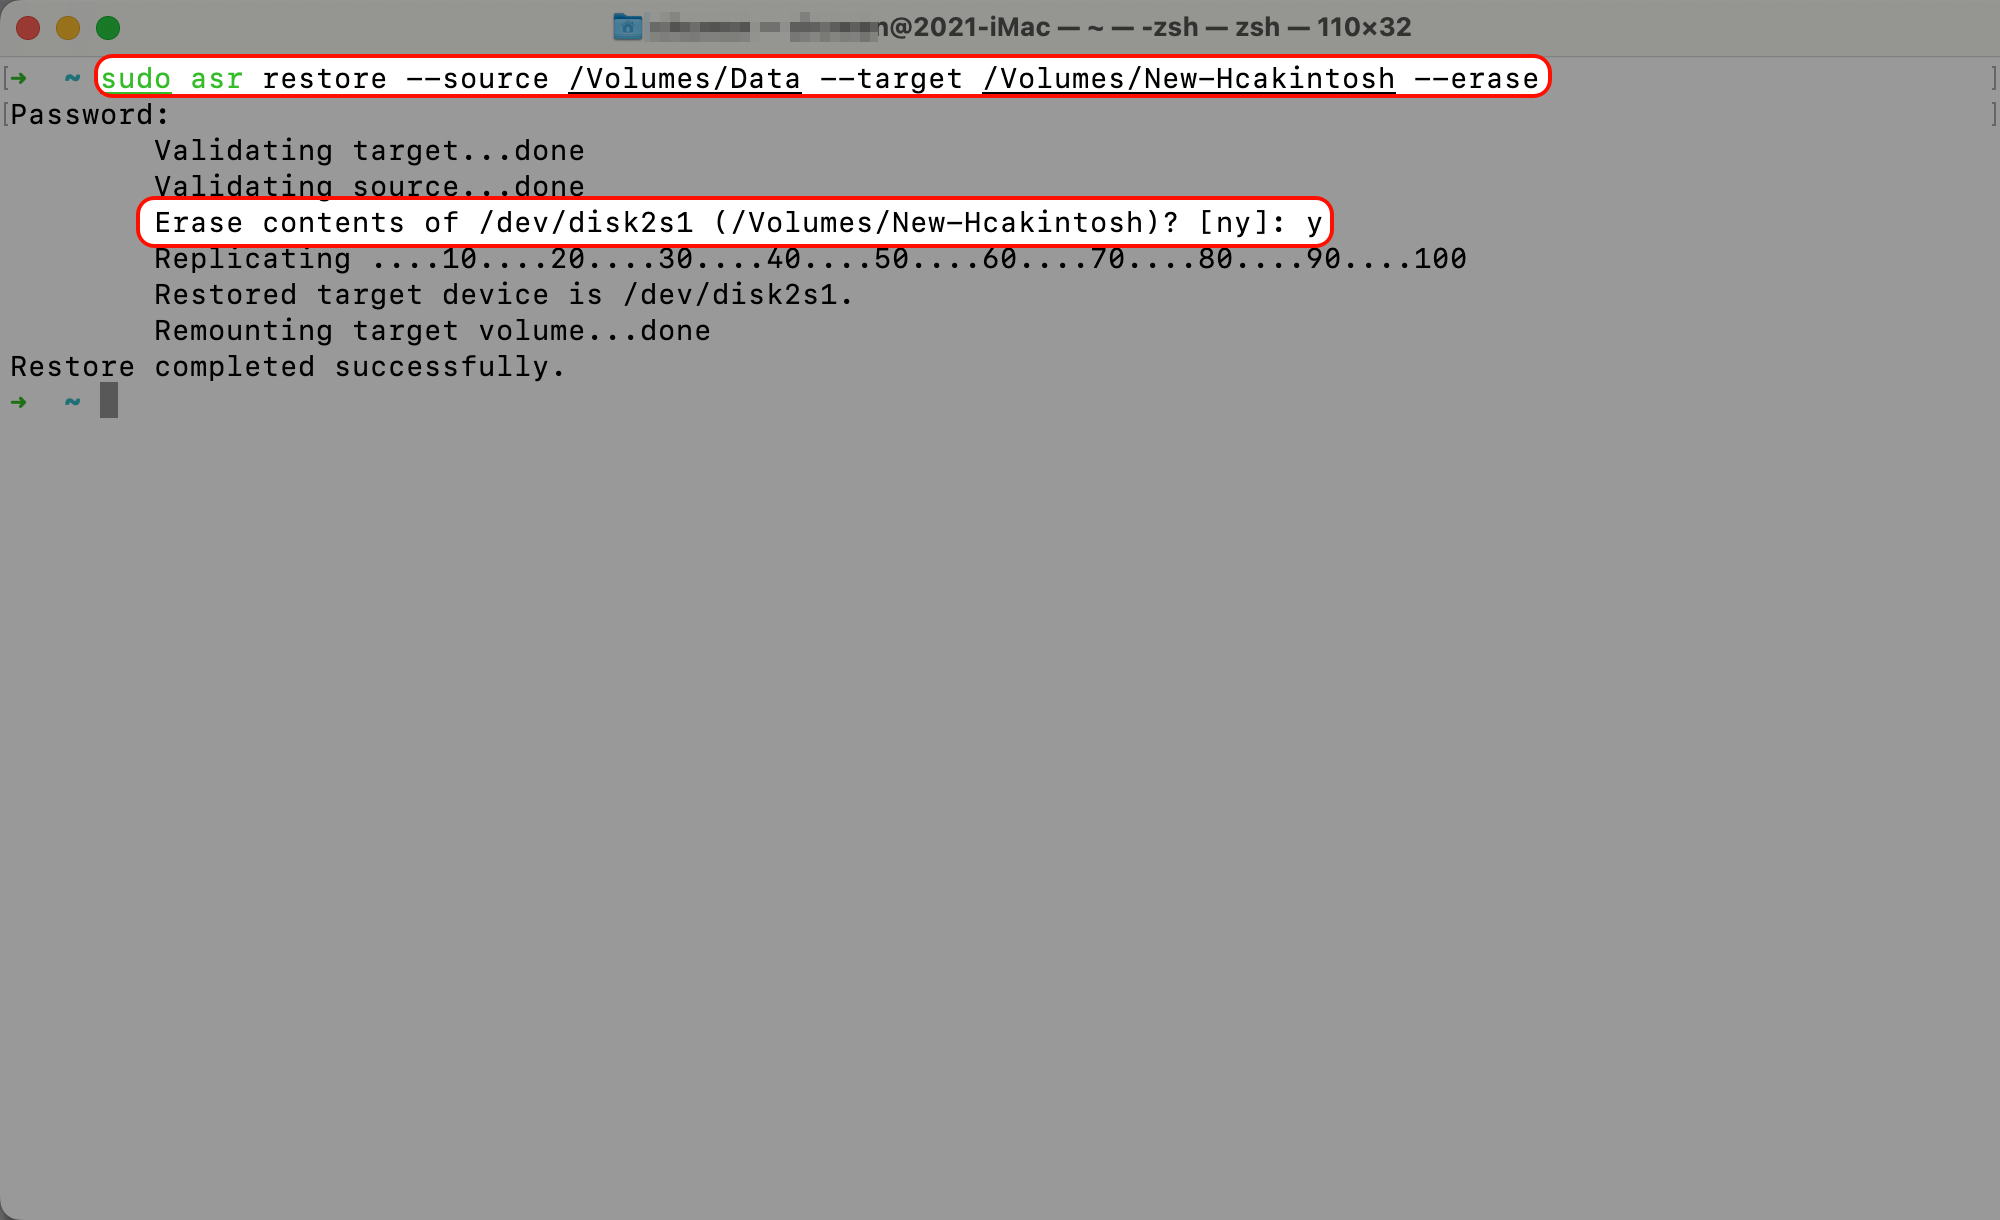 --- ## 常见用途场景 | 用途 | 是否推荐使用 asr | | ----------------- | ------------ | | 克隆 macOS 系统盘 | ✅ 是 | | Hackintosh 安装盘制作 | ✅ 是 | | 文件夹/用户数据拷贝 | ❌ 否(用 rsync) | | 制作 USB 安装盘(带完整系统) | ✅ 是 | | 定期增量备份 | ❌ 否(用 CCC) | --- ## 和其他工具对比 | 工具 | 是否支持系统迁移 | 支持块级克隆 | 是否免费 | 使用复杂度 | | ----------- | -------- | ------- | ---- | ----- | | asr | ✅ | ✅ | ✅ | 中 | | rsync/ditto | ❌(文件迁移) | ❌ | ✅ | 低 | | CCC | ✅ | ✅(增强功能) | ❌ | 低 | | SuperDuper! | ✅ | ✅ | 部分免费 | 低 | --- ## 总结 使用 `asr restore` 命令,是进行 macOS 磁盘数据迁移的专业方法之一。相比图形界面的 Time Machine 或第三方工具,`asr` 更加轻量、精准,特别适合以下用户: * 高级用户或开发者 * Hackintosh 爱好者 * 需要批量部署系统的技术人员 记得在执行命令前做好数据备份,确保目标磁盘的正确性。祝迁移顺利 🚀! --- ## 参考资料 * Apple 官方文档:`man asr`
导入并信任 GitHub Web Flow GPG 密钥 (noreply@github.com) 作者: Shine 时间: 2025-05-15 分类: 神奇技巧 评论 本指南介绍如何导入 GitHub Web Flow GPG 密钥,并手动将其信任等级设置为完全信任(ultimate),因为导入后的默认信任等级为未知。 ## 步骤 1:导入 GPG 密钥 使用以下命令导入 GitHub Web Flow GPG 密钥: ```bash curl https://github.com/web-flow.gpg | gpg --import ``` 该命令从 GitHub 下载 GPG 密钥并将其导入到您的 GPG 密钥环中。 ## 步骤 2:验证导入的密钥 导入后,您可以通过列出所有 GPG 密钥来验证密钥是否已成功添加: ```bash gpg --list-keys ``` 输出: > 其中有一个是过期的密钥,原因请参考: > * https://github.blog/news-insights/company-news/rotating-credentials-for-github-com-and-new-ghes-patches/ > * https://github.com/orgs/community/discussions/122178 ```bash pub rsa2048 2017-08-16 [SC] [过期于:2024-01-16] 5DE3E0509C47EA3CF04A42D34AEE18F83AFDEB23 uid [ 过期 ] GitHub (web-flow commit signing) <noreply@github.com> pub rsa4096 2024-01-16 [SC] 968479A1AFF927E37D1A566BB5690EEEBB952194 uid [ 未知 ] GitHub <noreply@github.com> ``` 查找与 `web-flow` 相关或 GitHub 提供的密钥 ID。输出将包含密钥的指纹和用户 ID 等详细信息,这里 KEY ID 是 `968479A1AFF927E37D1A566BB5690EEEBB952194` ## 步骤 3:将信任等级设置为完全信任 默认情况下,导入的密钥信任等级为未知,可能会在验证签名时出现问题。要将信任等级设置为完全信任,请按照以下步骤操作: 1. 启动 GPG 密钥编辑,针对特定的密钥。用实际的 GitHub Web Flow 密钥 ID 或指纹替换 `KEY_ID`: ```bash gpg --edit-key KEY_ID # gpg --edit -key 968479A1AFF927E37D1A566BB5690EEEBB952194 ``` 2. 在 GPG 提示符下,输入 `trust` 以修改信任设置: ``` gpg> trust ``` 3. 选择选项 `5` 表示完全信任: ``` 请决定您对该用户正确验证其他用户密钥的信任程度 (通过查看护照、检查不同来源的指纹等) 1 = 我不知道或不发表意见 2 = 我不信任 3 = 我略微信任 4 = 我完全信任 5 = 我绝对信任 m = 返回主菜单 您的决定? 5 ``` 4. 确认您的选择: ``` 您真的想将此密钥设置为绝对信任吗?(y/N) y ``` 5. 保存更改并退出: ``` gpg> quit ``` 示例截图: 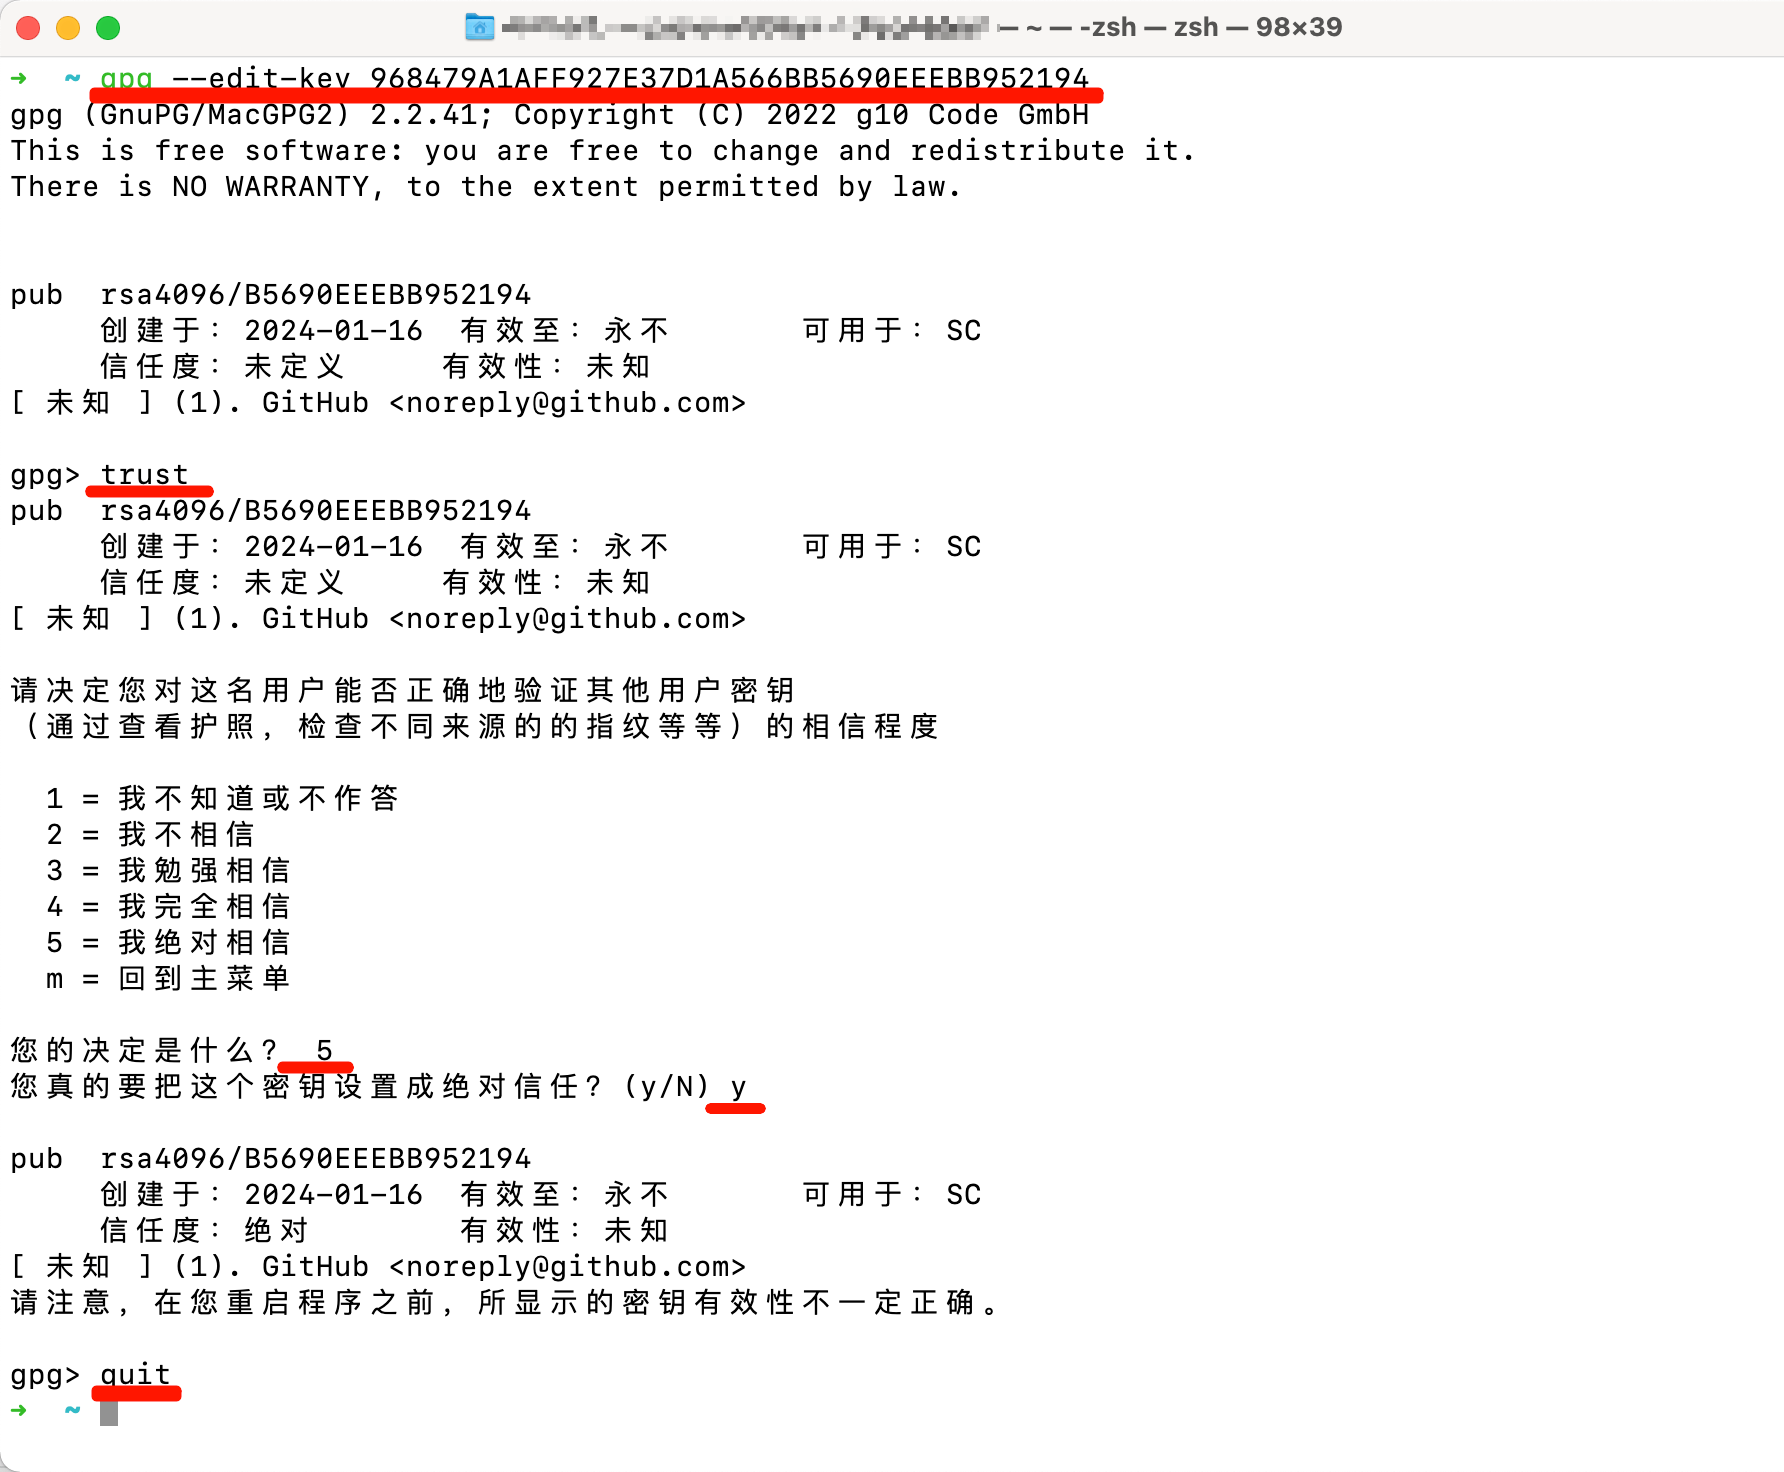 ## 步骤 4:验证信任等级 要确认信任等级已更新,再次列出密钥详情: ```bash gpg --list-keys ``` 输出应显示该密钥现已被设置为绝对信任。 ## 注意事项 - 请将 `KEY_ID` 替换为实际的 GitHub Web Flow 密钥 ID 或指纹,您可以在 `gpg --list-keys` 的输出中找到。 - 将密钥设置为绝对信任表示您完全信任其用于验证签名的能力。在操作前,请确保您对密钥的真实性有信心。 - 有关 GPG 密钥管理的更多信息,请参阅官方 GPG 文档或 GitHub 关于验证签名的文档。 相关参考链接: 1. https://gnupg.org/howtos/zh/GPGMiniHowto-3.html 2. https://github.blog/news-insights/company-news/rotating-credentials-for-github-com-and-new-ghes-patches/
理解 Composer 的环境变量 COMPOSER_IGNORE_PLATFORM_REQ 和 COMPOSER_IGNORE_PLATFORM_REQS 作者: Shine 时间: 2025-05-15 分类: PHP 评论 在 PHP 项目开发中,[Composer](https://getcomposer.org/) 是管理依赖的核心工具。它通过检查 PHP 环境(如版本和扩展)确保依赖兼容性。但有时我们需要在不符合平台要求的条件下安装依赖,这时环境变量 `COMPOSER_IGNORE_PLATFORM_REQ` 和 `COMPOSER_IGNORE_PLATFORM_REQS` 提供了解决方案。 ## 什么是 `COMPOSER_IGNORE_PLATFORM_REQ` 和 `COMPOSER_IGNORE_PLATFORM_REQS`? 这两个环境变量用于绕过 Composor 的平台要求检查,平台要求包括: - PHP 版本(如 `php: ^7.4`) - PHP 扩展(如 `ext-curl`、`ext-json`) - 其他系统级依赖 当环境不满足依赖要求时,Composer 会报错并阻止安装。两者的区别在于: - **`COMPOSER_IGNORE_PLATFORM_REQ`**:允许指定忽略特定的平台要求(如 `ext-curl` 或 `php`)。 - **`COMPOSER_IGNORE_PLATFORM_REQS`**:忽略所有平台要求,等效于命令行选项 `--ignore-platform-reqs`。 ## 为什么需要忽略平台要求? 常见场景包括: 1. **开发或测试**:本地或 CI/CD 环境的 PHP 版本或扩展与生产环境不同,但需安装依赖进行测试。 2. **临时绕过**:某些依赖在未满足官方要求的环境中仍可运行。 3. **遗留项目**:老项目依赖的包可能与新环境不完全兼容,但需继续维护。 ## 如何使用? ### 使用 `COMPOSER_IGNORE_PLATFORM_REQ` 通过环境变量指定要忽略的特定平台要求: ```bash COMPOSER_IGNORE_PLATFORM_REQ=ext-curl composer install ``` 忽略多个要求时,用逗号分隔: ```bash COMPOSER_IGNORE_PLATFORM_REQ=ext-curl,ext-json composer update ``` ### 使用 `COMPOSER_IGNORE_PLATFORM_REQS` 若需忽略所有平台要求,设置此变量(无需指定具体要求): ```bash COMPOSER_IGNORE_PLATFORM_REQS=1 composer install ``` 或者直接使用命令行选项: ```bash composer install --ignore-platform-reqs ``` ### 在类 Unix 平台持久化配置 在类 Unix 系统(如 Linux 或 macOS)中,可以将环境变量添加到 shell 配置文件(如 `.bashrc` 或 `.zshrc`)以持久化设置。步骤如下: 1. 打开终端,编辑配置文件(以 Zsh 为例): ```bash nano ~/.zshrc ``` 对于 Bash,编辑 `.bashrc`: ```bash nano ~/.bashrc ``` 2. 在文件末尾添加以下行,例如忽略 `ext-curl`: ```bash export COMPOSER_IGNORE_PLATFORM_REQ=ext-curl ``` 或忽略所有要求: ```bash export COMPOSER_IGNORE_PLATFORM_REQS=1 ``` 多个特定要求: ```bash export COMPOSER_IGNORE_PLATFORM_REQ=ext-curl,ext-json ``` 3. 保存并刷新 shell 配置: ```bash source ~/.zshrc ``` 或: ```bash source ~/.bashrc ``` 4. 验证设置: ```bash echo $COMPOSER_IGNORE_PLATFORM_REQ echo $COMPOSER_IGNORE_PLATFORM_REQS ``` 此后,Composer 命令将自动应用这些设置。 ### Windows 用户 在 Windows 命令行中,临时设置语法为: ```cmd set COMPOSER_IGNORE_PLATFORM_REQ=ext-curl && composer install set COMPOSER_IGNORE_PLATFORM_REQS=1 && composer install ``` ## 潜在风险 使用这两个变量需注意: 1. **运行时错误**:忽略要求可能导致依赖在运行时因缺少扩展或版本不兼容而失败。 2. **生产环境谨慎**:建议仅在开发或测试中使用,生产环境应满足依赖要求。 3. **调试复杂**:绕过检查可能增加问题排查难度。 ## 最佳实践 - **选择合适的变量**:若只需忽略特定要求,使用 `COMPOSER_IGNORE_PLATFORM_REQ`;若需忽略全部,使用 `COMPOSER_IGNORE_PLATFORM_REQS`。 - **记录原因**:在项目文档中说明忽略平台要求的理由,便于团队理解。 - **充分测试**:忽略要求后,彻底测试应用以确保依赖正常运行。 ## 总结 `COMPOSER_IGNORE_PLATFORM_REQ` 和 `COMPOSER_IGNORE_PLATFORM_REQS` 是 Composer 的强大工具,分别用于忽略特定或全部平台要求检查。在类 Unix 系统中,通过配置 `.bashrc` 或 `.zshrc`,可以持久化这些设置,提升开发效率。但需谨慎使用,确保测试充分并避免在生产环境中引入风险。合理运用这些变量,能让 PHP 依赖管理更加灵活。
使用 MacPorts 替代 brew / 解决低版本 macOS 系统使用 brew 安装软件包慢的问题 作者: Shine 时间: 2025-05-13 分类: macOS 评论 ## 背景 根据官方的介绍,brew 仅适合 macOS 13 及更高的版本上使用了:https://docs.brew.sh/Installation#macos-requirements 对于我还在用黑苹果 macOS Big Sur 确实不友好(公司电脑 3、4 年都没更新硬件了 😓) 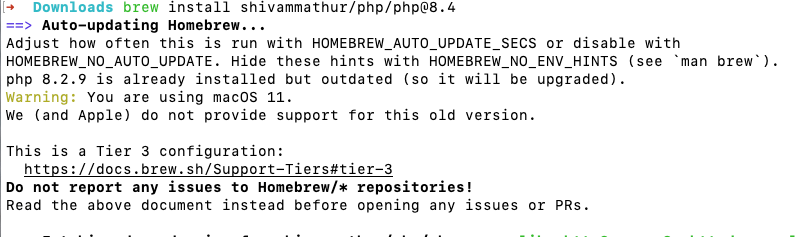 ## brew 替代品 - MacPorts 通过在网络搜索,很多人推荐使用 [MacPorts](https://macports.org/ "MacPorts") 替代 brew。 安装方法也很简单,下载一个安装包就可以用了,具体安装教程看这个:https://www.macports.org/install.php 以我的系统 Big Sur 为例,我就下载对应的版本安装就好了 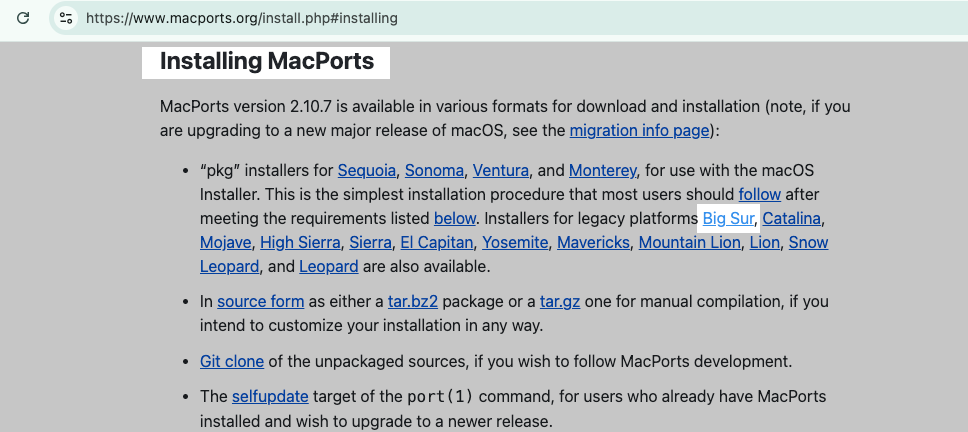 ### 使用方法 使用方法也很简单,访问这个网站 https://ports.macports.org/ 搜索你要的软件,比如 PHP84 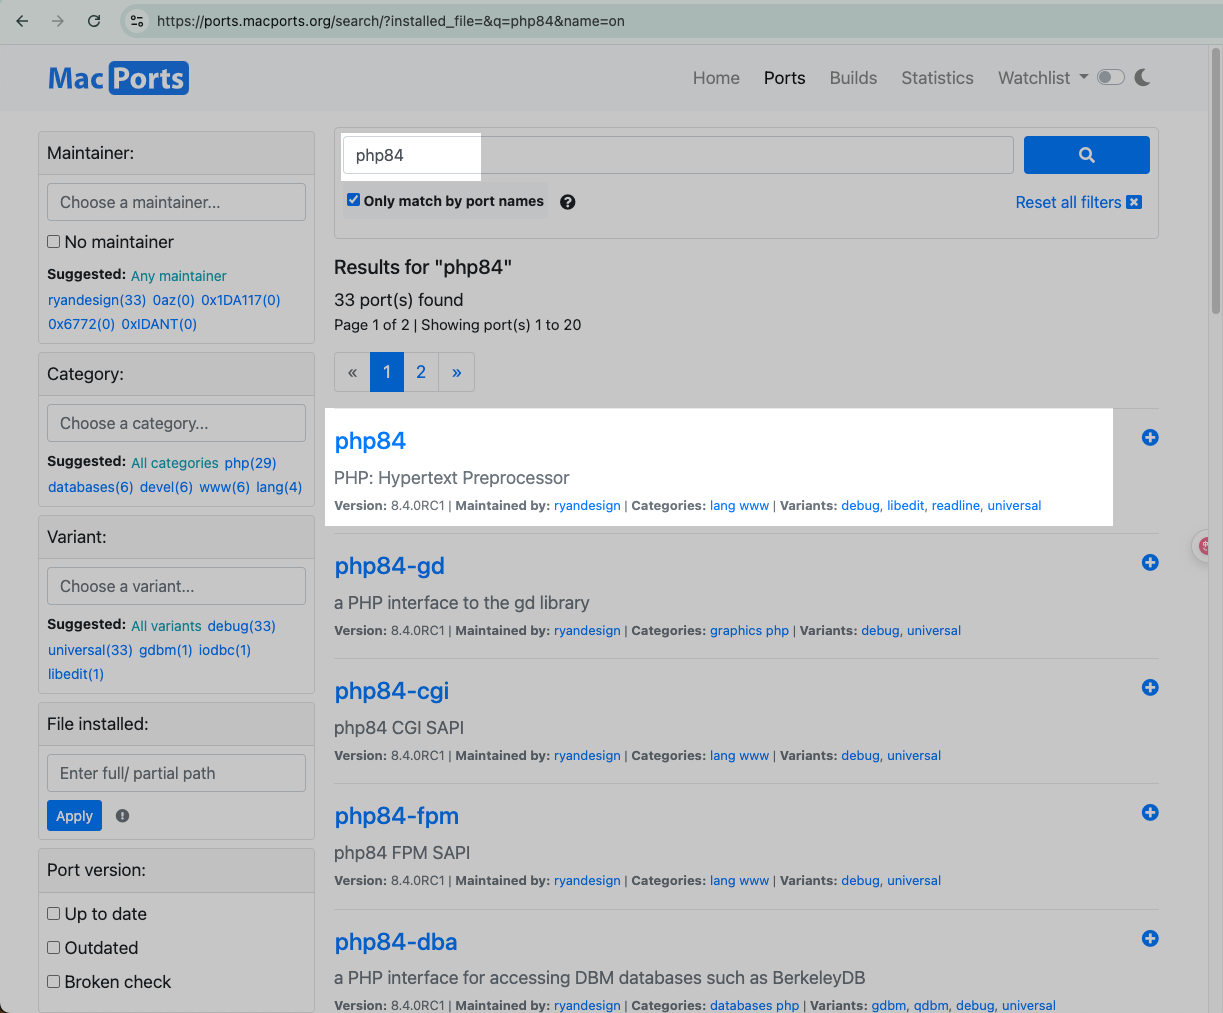 找到对应的版本,点击进入详情,然后就会提示你用什么命令安装,点击 Copy 返回到终端执行即可: | - | - | | ------------ | ------------ | | 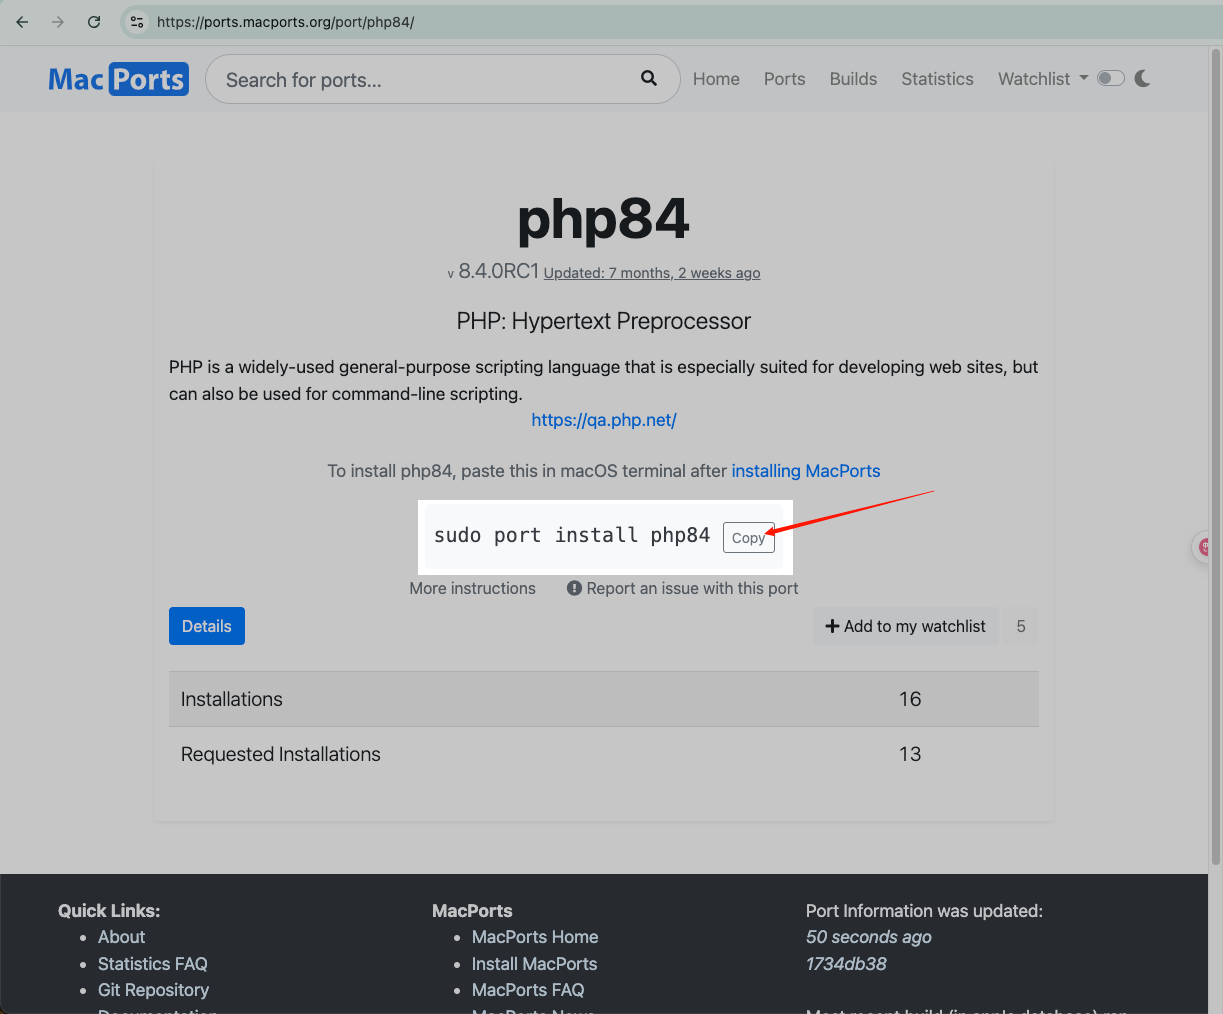 | 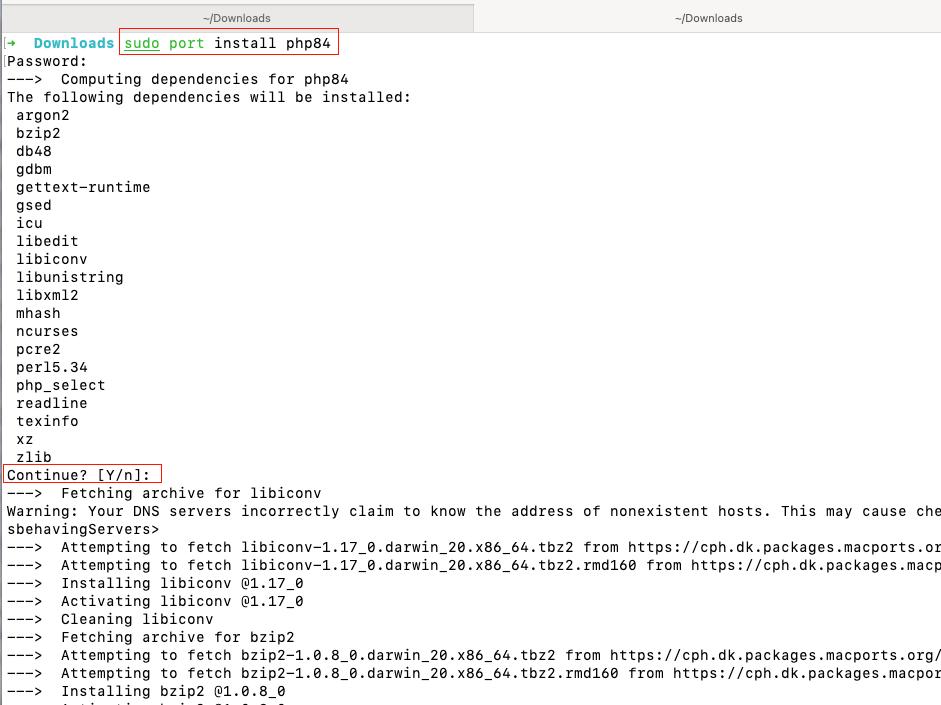 | | |  | 网络环境好的情况下,安装速度挺快的