Nginx 判断 GET 参数是否为空,如果为空设置默认值 作者: Chuwen 时间: 2023-03-14 分类: Nginx 评论 ## 配置如下 ```nginx // 如果 GET 参数 shop 为空,则设置默认值为 default-shop.com map $arg_shop $get_shop { "" "default-shop.com"; default $arg_shop; } server { listen 80; server_name example.com; index index.html; root /www/wwwroot/example.com; location { // 使用变量 add_header X-Shop $get_shop; } } ```
Nginx 根据 Cookie 的值来判断访问哪个环境(预发布、生产) 作者: Chuwen 时间: 2022-10-26 分类: Nginx 评论 ## 背景 **预发布环境**是新版本上线前的一道保障,但是如切换 `hosts` 的方式去测试会有诸多不便,可能会阻碍了测试、开发人员进行测试。所以想出使用此方法,自认为是比较好进入**预发布环境**的方法之一。 ## 使用说明 主要实现逻辑在这里:[L27 - L33](https://gist.github.com/PrintNow/4814c757d8f598496e24fe9acdb15c39#file-nginx-view-mulite-env-conf-L27-L33) 具体的还需要各自的需求修改 `$_proxy_pass` 变量 1. 访问 `/.env/staging` 路径,然后再打开**绑定的域名**,就会进入*预发布环境* 2. 访问 `/.env/remove` 路径,然后再打开**绑定的域名**,就会进入默认环境,也就是*生产环境* ## 如何确定访问的是哪个环境? 按照上面的 Nginx 配置,访问对应的环境可以在 HTTP Headers 看 [`X-Server-Env` 字段](https://gist.github.com/PrintNow/4814c757d8f598496e24fe9acdb15c39#file-nginx-view-mulite-env-conf-L35) 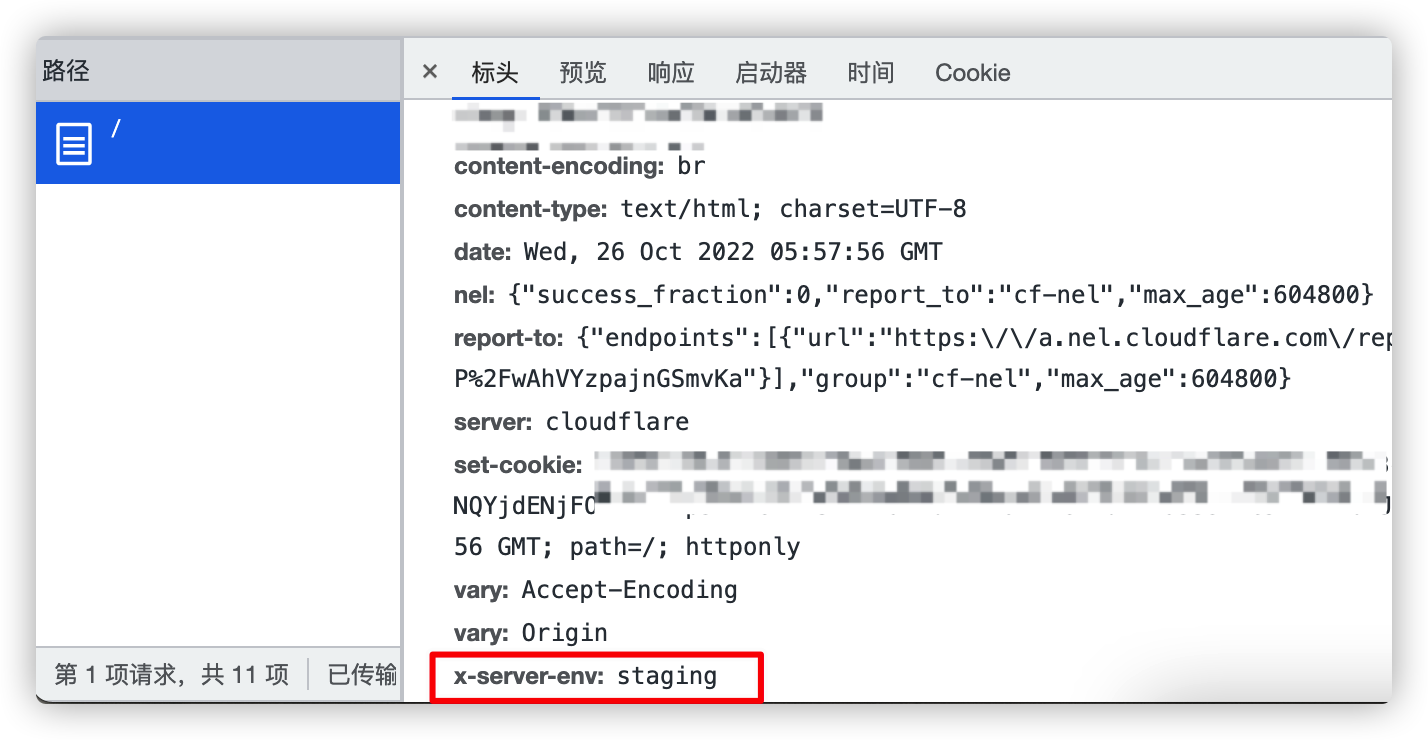 ---- 详情请查看:https://gist.github.com/PrintNow/4814c757d8f598496e24fe9acdb15c39
Nginx 层面修改 PHP-fpm HTTP_HOST、SERVER_NAME 等 作者: Chuwen 时间: 2022-10-18 分类: Nginx 评论 参考 Nginx 官方 FastCGI 例子:https://www.nginx.com/resources/wiki/start/topics/examples/fastcgiexample/ ```nginx location ~ [^/]\.php(/|$) { try_files $uri =404; fastcgi_pass unix:/tmp/php-cgi-80.sock; fastcgi_index index.php; include fastcgi.conf; include pathinfo.conf; fastcgi_param HTTP_HOST test.com; fastcgi_param SERVER_NAME test.com; fastcgi_param SERVER_SOFTWARE 6666666666666; } ``` 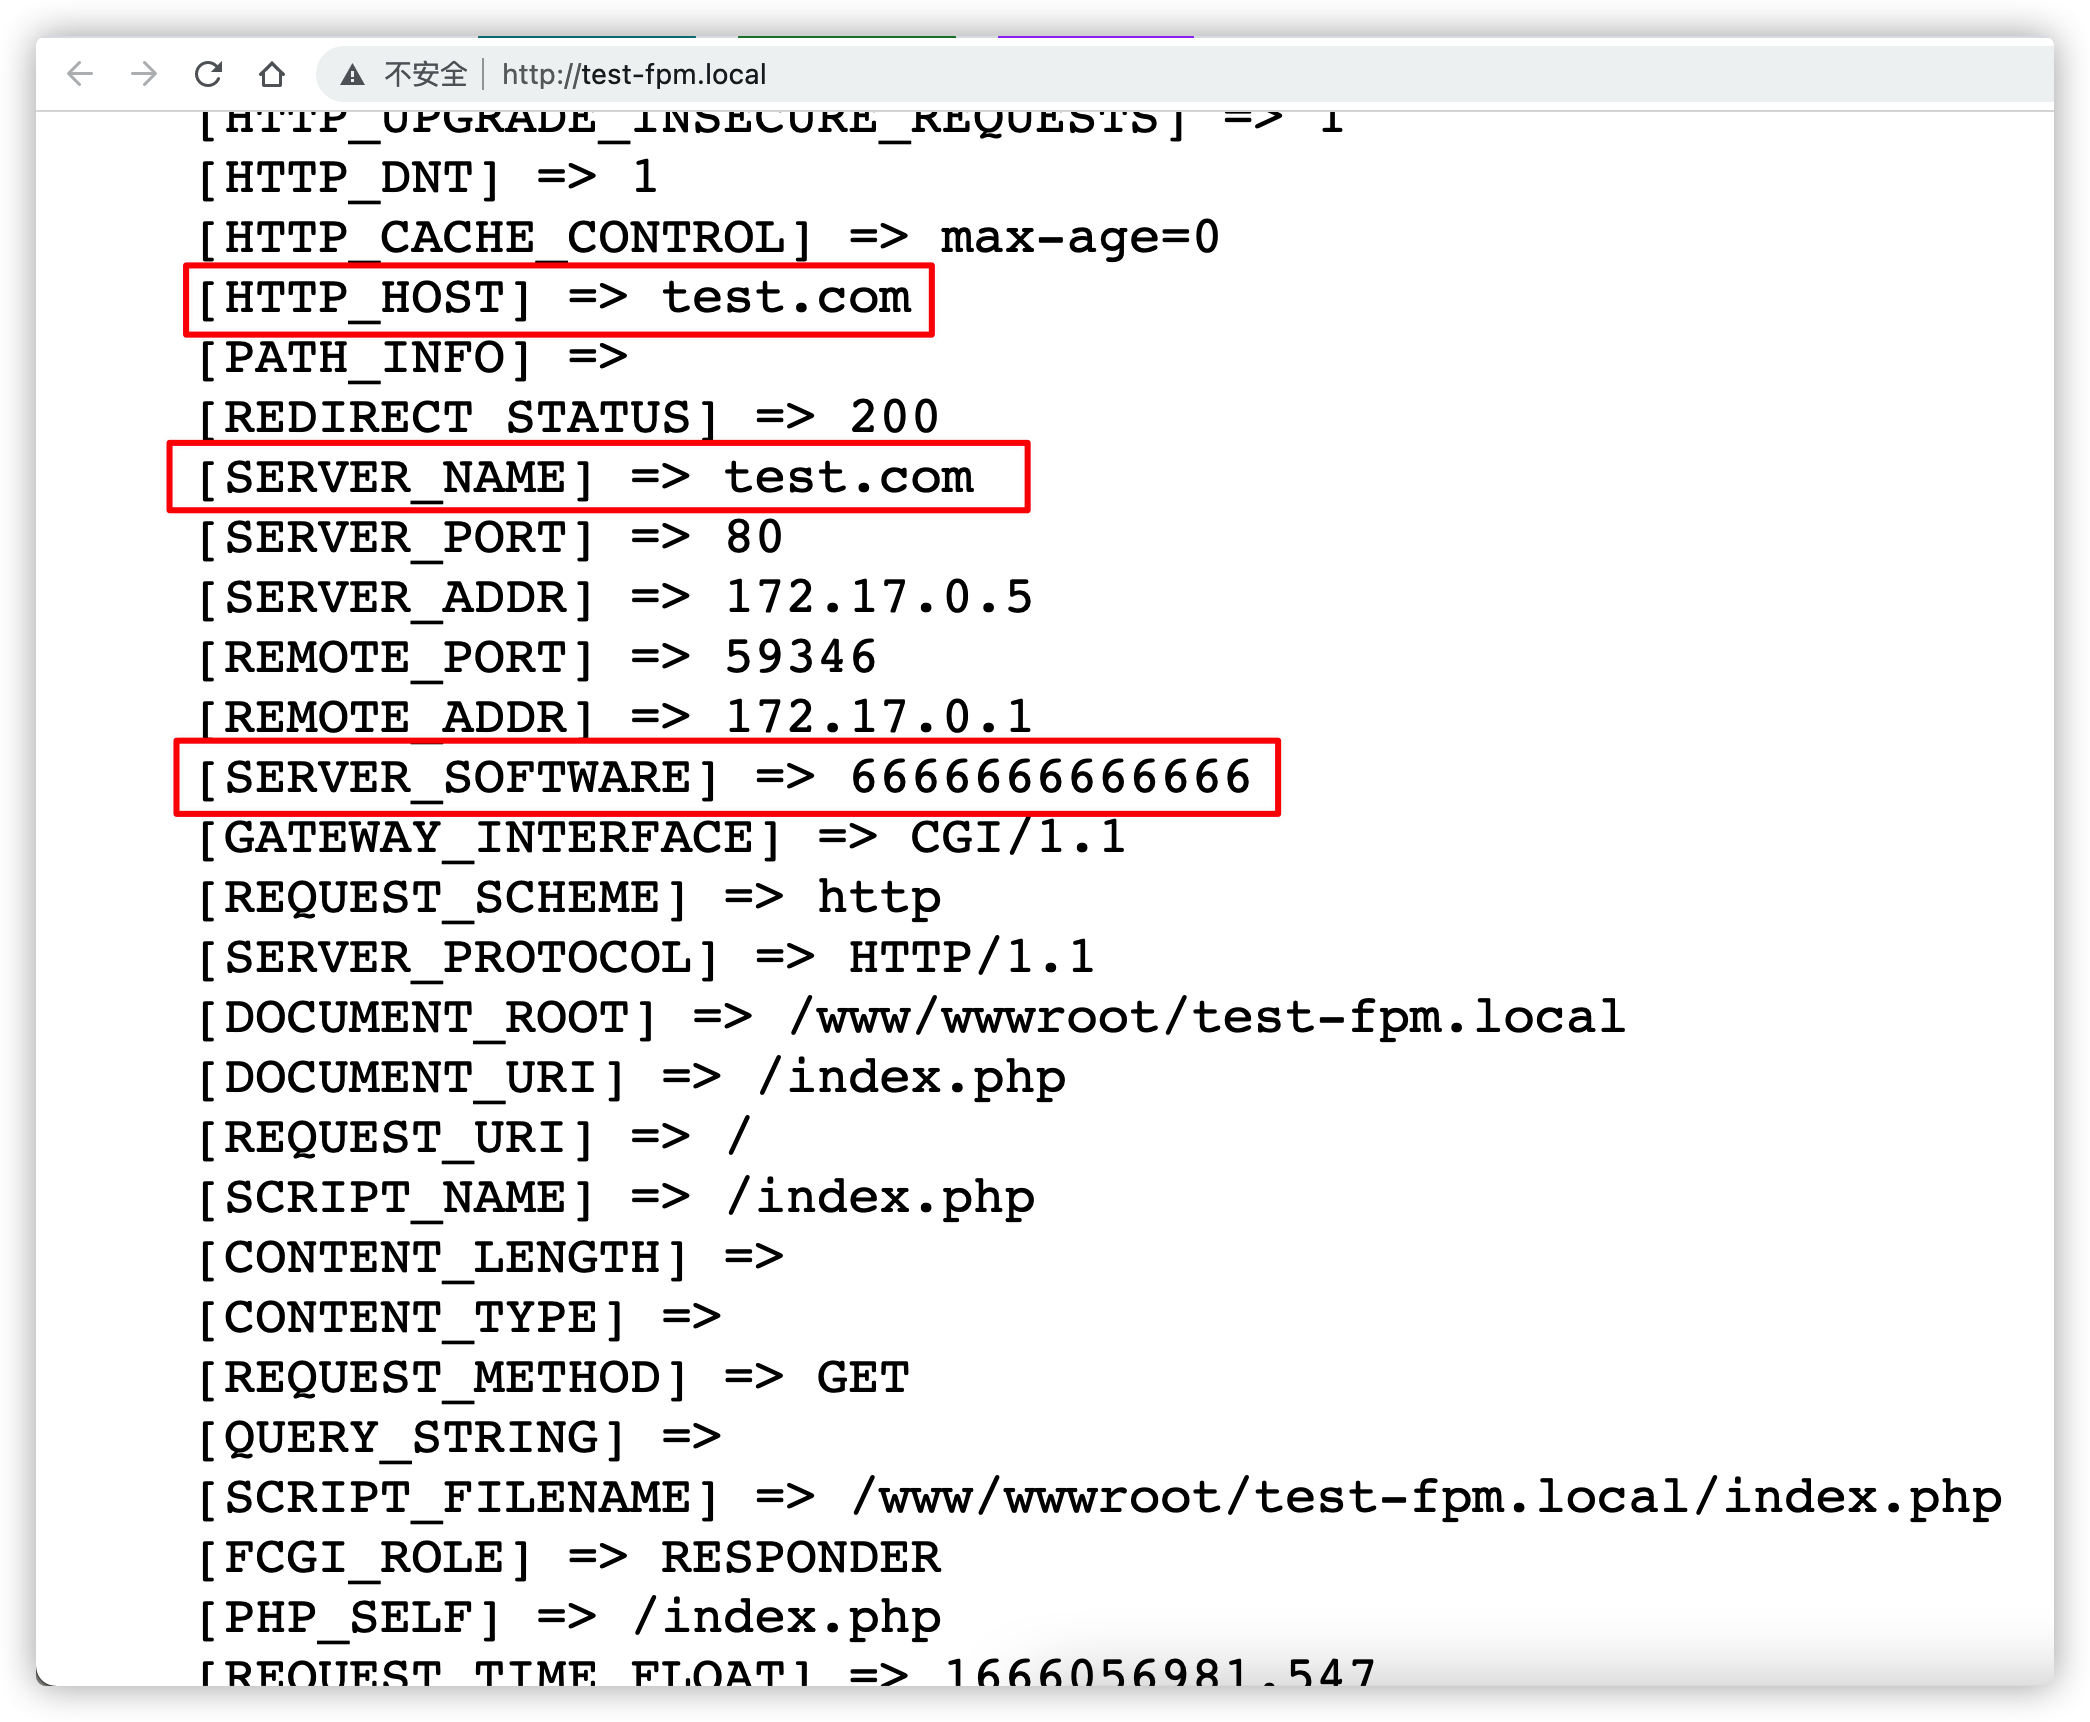
Nginx 根据 Host 头转发请求到不同的后端服务器 作者: Chuwen 时间: 2022-10-15 分类: Nginx 评论 ## 问题 有一个很老很老的 Laravel 项目,很多东西都是写死的,就比如路由文件,直接写死了这个域名绑定哪个路由。 目前遇到的问题是,没有的测试、预发布环境,导致测试一些东西就非常麻烦,又因为如上面说的直接写死了「哪个域名绑定哪个路由」,也不敢改,怕出问题,能跑就行 /dog。 所以就想到了用 Nginx 来做一个反向代理,根据 Host 头来转发请求。 ## 部署 因为我想把代码部署到云服务器上,但是项目域名没有备案的,所以购买服务器的地域选择了 **香港**。 但是众所周知的原因,国内某些大厂云服务器商,回国线路很差,丢包、连不上,所以套了个 Cloudflare 加速访问 **所以最终架构如下:** > `shine.proxy` 是代理域名 > > `project.app` 是项目域名 - 访问 `shine.proxy` - Nginx 转发到 `project.app` - 访问 `api.shine.proxy` - Nginx 转发到 `api.project.app` **所以 Nginx 配置如下:** ```nginx server { listen 80; server_name shine.proxy api.shine.proxy; # 定义个变量 set $_proxy_host ''; # 判断 Host 等于 shine.proxy 时 # 将 project.app 值赋值给变量 $_proxy_host if ( $host = "shine.proxy" ) { set $_proxy_host project.app; } # 同上 if ( $host = "api.shine.proxy" ) { set $_proxy_host api.project.app; } location / { add_header X-Server-Env test always; proxy_http_version 1.1; proxy_set_header Connection ""; proxy_set_header X-Real-IP $remote_addr; proxy_set_header X-Real-PORT $remote_port; proxy_set_header X-Forwarded-For $proxy_add_x_forwarded_for; proxy_set_header Scheme $scheme; proxy_set_header Server-Protocol $server_protocol; proxy_set_header Server-Name $server_name; proxy_set_header Server-Addr $server_addr; proxy_set_header Server-Port $server_port; # 注意这里,重写反代的头 proxy_set_header Host $_proxy_host; # 代理到后端服务器 proxy_pass http://127.0.0.1; } } ```
Nginx 配置反向代理 add_header 不生效的原因及解决办法 作者: Chuwen 时间: 2021-04-30 分类: Nginx 评论 ## 背景 因同事用 Hyperf 搭建的接口,然后用 Vue.js 写的前端去调用,出现跨域问题 ## 无效原因 > Nginx `add_header` 只对 `200,201,204,206,301,302,303,304,307` 这些状态码生效,对于 401 405 403 这些状态码是不生效的。 恰好我测试的时候就随便访问了个链接,返回的状态码是 **404** 的,结果一直刷新都不出来添加的 `header` ## 解决办法 在末尾加一个 `always` 即可,即: ```conf add_header Access-Control-Allow-Origin * always; ``` 此外还引出一个问题,就是如果你将 **Access-Control-Allow-Origin** 头的值设置为 `*`,那么前端进行请求时,不出意外的话浏览器控制台就会提示这个错误:  > Access to XMLHttpRequest at 'http://api.xxxxxxx.com/v1/userinfo from origin 'http://localhost:8080' has been blocked by CORS policy: Response to preflight request doesn't pass access control check: The value of the 'Access-Control-Allow-Origin' header in the response must not be the wildcard '*' when the request's credentials mode is 'include'. The credentials mode of requests initiated by the XMLHttpRequest is controlled by the withCredentials attribute. > > **机翻成中文:** > > 通过CORS策略已阻止从来源 “http://localhost:8080” 访问 “http://api.xxxxxxx.com/v1/userinfo” 处的XMLHttpRequest:对预检请求的响应未通过访问 控制检查:当请求的凭据模式为“包括”时,响应中“访问控制允许-来源”标头的值不得为通配符“ *”。 XMLHttpRequest 发起的请求的凭据模式由 withCredentials 属性控制。 > > 相关链接:https://developer.mozilla.org/zh-CN/docs/Web/HTTP/Headers/Access-Control-Allow-Credentials ### 原因是:当前端(如 axios)配置 `withCredentials=true` 时, 后端配置 `Access-Control-Allow-Origin` 不能为 `*`, 必须是相应地址 ### axios 设置 withCredentials 为 false ```js // axios配置 axios.defaults.withCredentials = false; // 携带cookie ``` --- 更多相关跨于问题,这篇文章可以作参考:https://juejin.cn/post/6844903748288905224 以下是从上述链接渣摘抄 ### 问题 1 > 解决方案:当前端配置withCredentials=true时, 后端配置Access-Control-Allow-Origin不能为*, 必须是相应地址 ``` Access to XMLHttpRequest at 'http://127.0.0.1:8081/getInfo?t=1545900042823' from origin 'http://localhost:8080' has been blocked by CORS policy: Response to preflight request doesn't pass access control check: The value of the 'Access-Control-Allow-Origin' header in the response must not be the wildcard '*' when the request's credentials mode is 'include'. The credentials mode of requests initiated by the XMLHttpRequest is controlled by the withCredentials attribute. ``` ### 问题 2 > 解决方案:当配置withCredentials=true时, 后端需配置Access-Control-Allow-Credentials ``` Access to XMLHttpRequest at 'http://127.0.0.1:8081/getInfo?t=1545899934853' from origin 'http://localhost:8080' has been blocked by CORS policy: Response to preflight request doesn't pass access control check: The value of the 'Access-Control-Allow-Credentials' header in the response is '' which must be 'true' when the request's credentials mode is 'include'. The credentials mode of requests initiated by the XMLHttpRequest is controlled by the withCredentials attribute. ``` ### 问题 3 > 解决方案:当前端配置请求头时, 后端需要配置Access-Control-Allow-Headers为对应的请求头集合 ``` Access to XMLHttpRequest at 'http://127.0.0.1:8081/getInfo?t=1545898876243' from origin 'http://localhost:8080' has been blocked by CORS policy: Request header field x-requested-with is not allowed by Access-Control-Allow-Headers in preflight response. ```