Laravel `Http::withUrlParameters` 用法 作者: Shine 时间: 2023-07-18 分类: Laravel,PHP 评论 ## 使用前 在调用 HTTP API 时会发现有很多 API 都是采用 *REST API* 风格,例如: * /admin/api/2023-07/products/{product_id}.json * /admin/api/2023-01/orders/{order_id}.json * /admin/api/2023-01/orders/{order_id}/fulfillments/{fulfillment_id}.json * ... 不难发现它们都有一个共同点,以花括号(`{var_name}`、`{order_id}`)包裹的变量替换为对应的值,通常我们可能会这么做: ```php $http = \Illuminate\Support\Facades\Http::baseUrl('https://example.com'); $order_id = 123456789; $fulfillment_id = 9889894445; $orderUrl = sprintf('/admin/api/2023-07/orders/%d.json', $product_id); $fulfillmentUrl = sprintf('/admin/api/2023-01/orders/%d/fulfillments/%d.json', $order_id, $fulfillment_id); $order = $http->get($orderUrl); $fulfillment = $http->get($fulfillmentUrl); ``` 但是会发现这样拼接 URI 会很繁琐 ## 使用后 - `Http::withUrlParameters` ```php $http = \Illuminate\Support\Facades\Http::baseUrl('https://example.com') ->withUrlParameters([ 'order_id' => 123456789, 'fulfillment_id' => 9889894445 ]); // 比如你要使用上述定义 URL 参数:order_id // 你在 URL 只需要填 {order_id} // 在请求时会自动替换 $orderUrl = '/admin/api/2023-07/orders/{order_id}.json'; $fulfillmentUrl = '/admin/api/2023-01/orders/{orders_id}/fulfillments/{fulfillment_id}.json'; $order = $http->get($orderUrl); $fulfillment = $http->get($fulfillmentUrl); ``` 会发现使用会很方便,不需要再使用如 `sprintf` 去拼接 URL 了
解决运行 php 命令出错:dyld: Library not loaded: /usr/local/opt/icu4c/lib/libicuio.72.dylib 作者: Shine 时间: 2023-07-07 分类: 编程工具 评论 ## 解决办法 重新安装 `icu4c` 即可 ```shell brew reinstall icu4c ``` --- 解决方案来源:https://gist.github.com/berkedel/d1fc6d13651c16002f64653096d1fded?permalink_comment_id=3676196#gistcomment-3676196
PHPStorm 命令行工具支持 - 添加 hyperf 命令 作者: Shine 时间: 2023-07-07 分类: 神奇技巧 评论 ## 操作步骤 1. 打开 PHPStorm 设置 2. 选择 **Tools | Command Line Tool Support**(工具) 3. 再选择 **Command Line Tools**(命令行工具支持) 4. 点击 “+” 添加 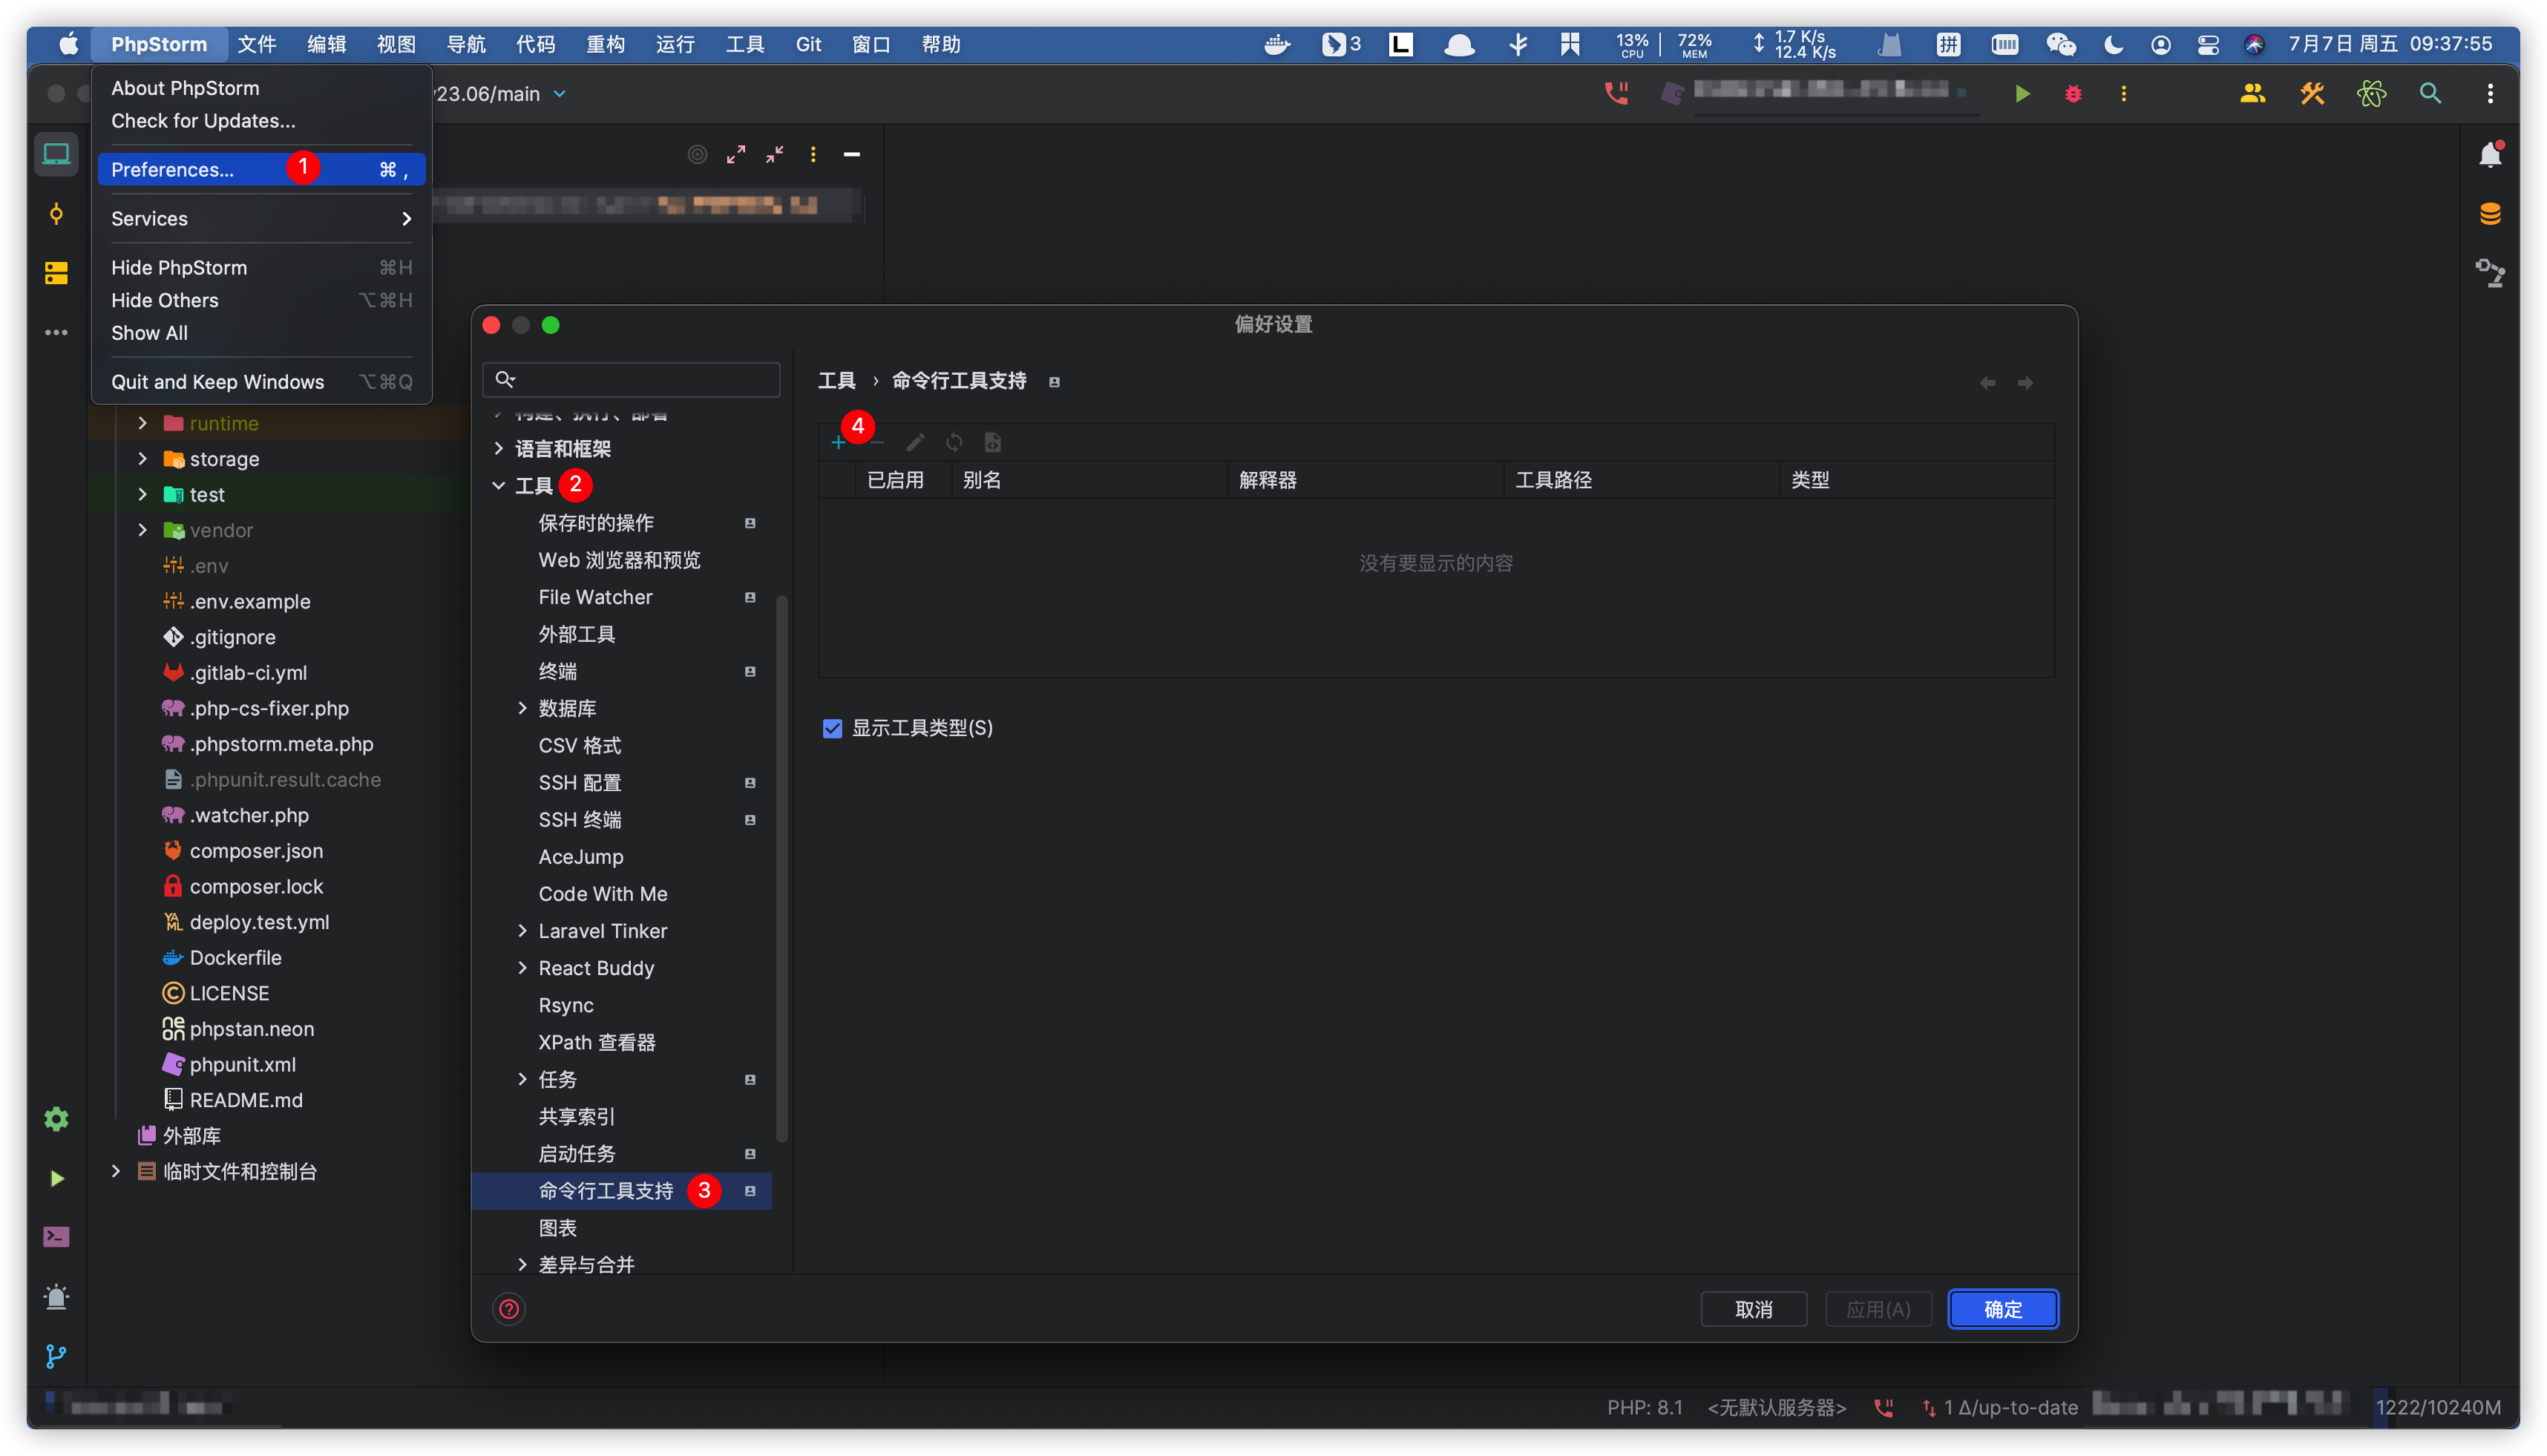 5. 按照如图所示选择 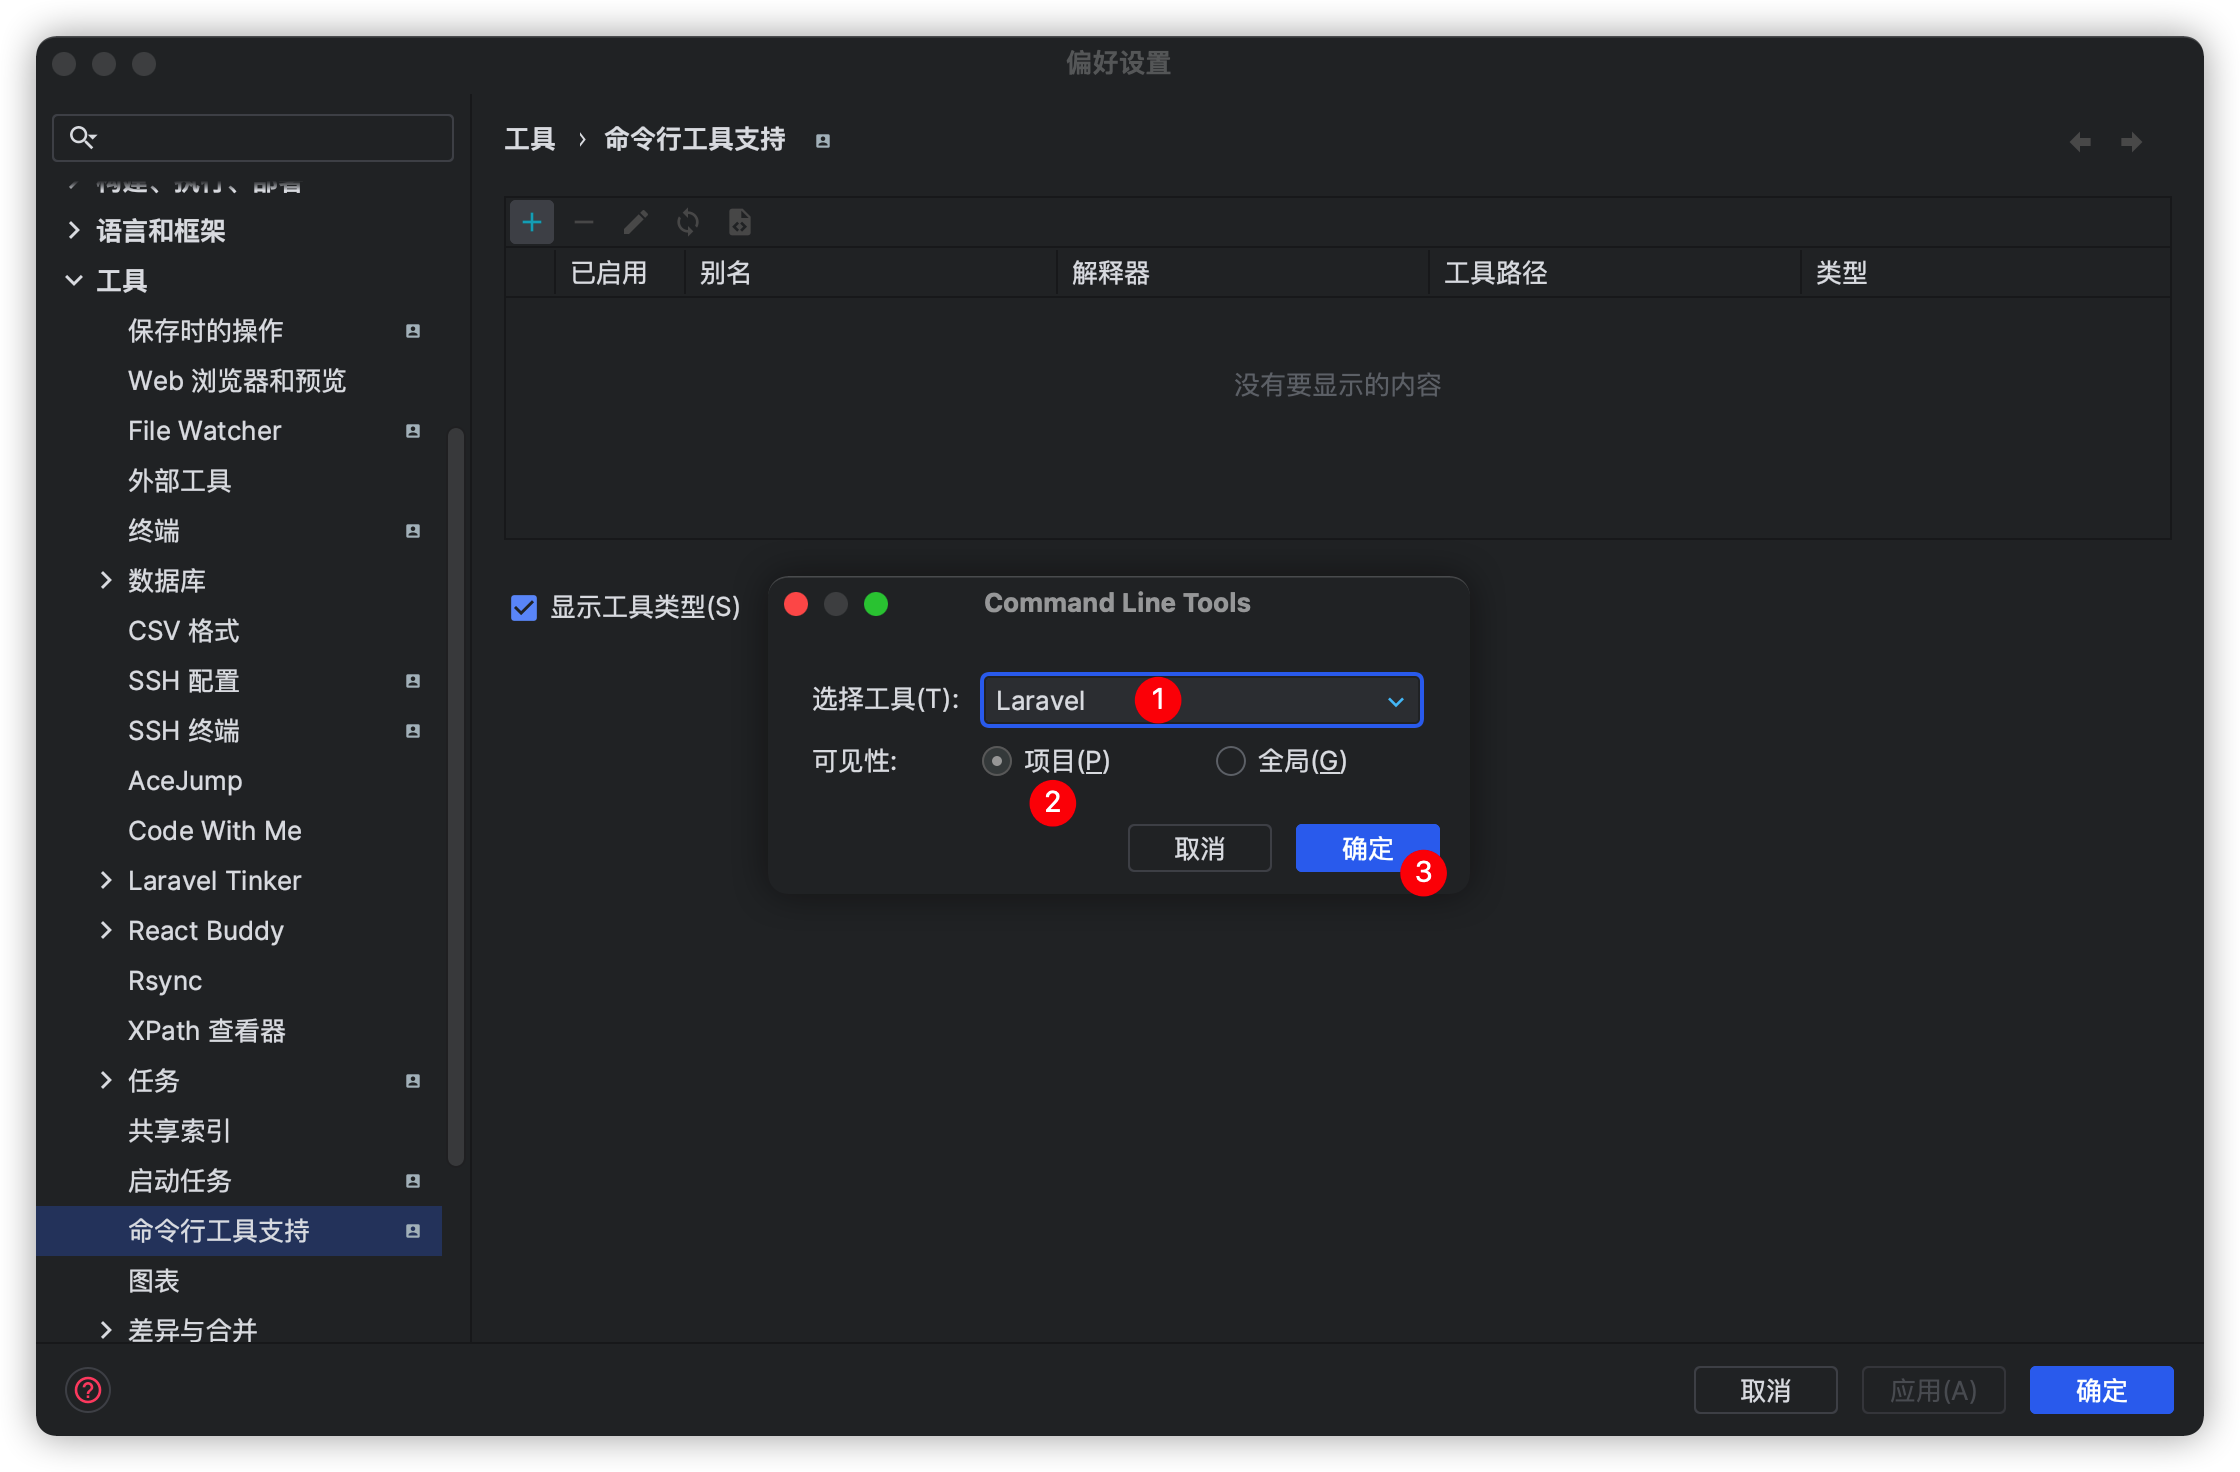 6. 工具设置 * **别名** 可按照自己需求输入比如 `hyperf`、`h`,这里我为了方便选择 `h` 作为别名 * **脚本路径** 输入 hyperf 脚本的相对路径 `bin/hyperf.php` 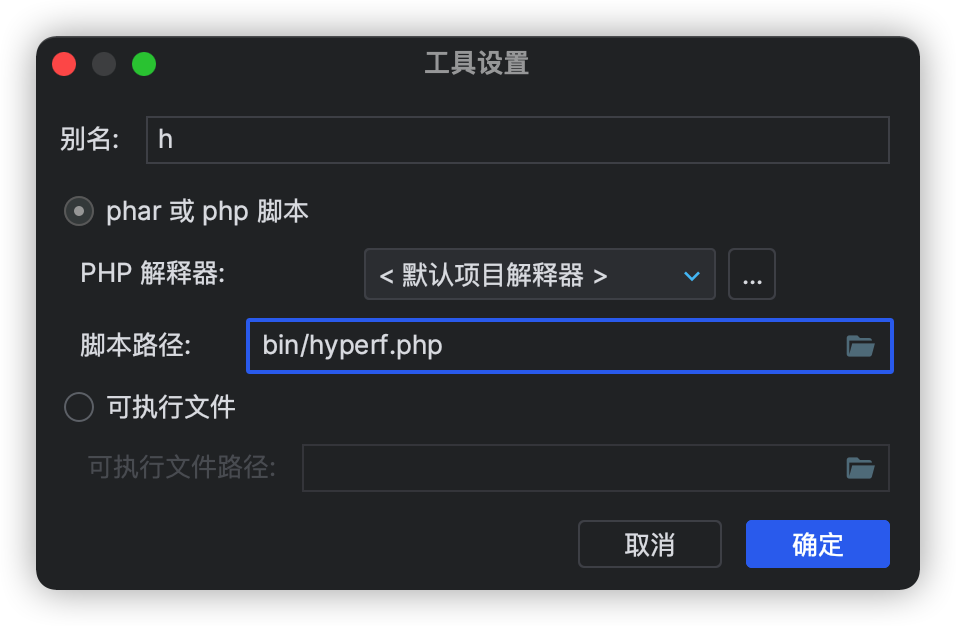 7. 最点击确定、应用设置即可 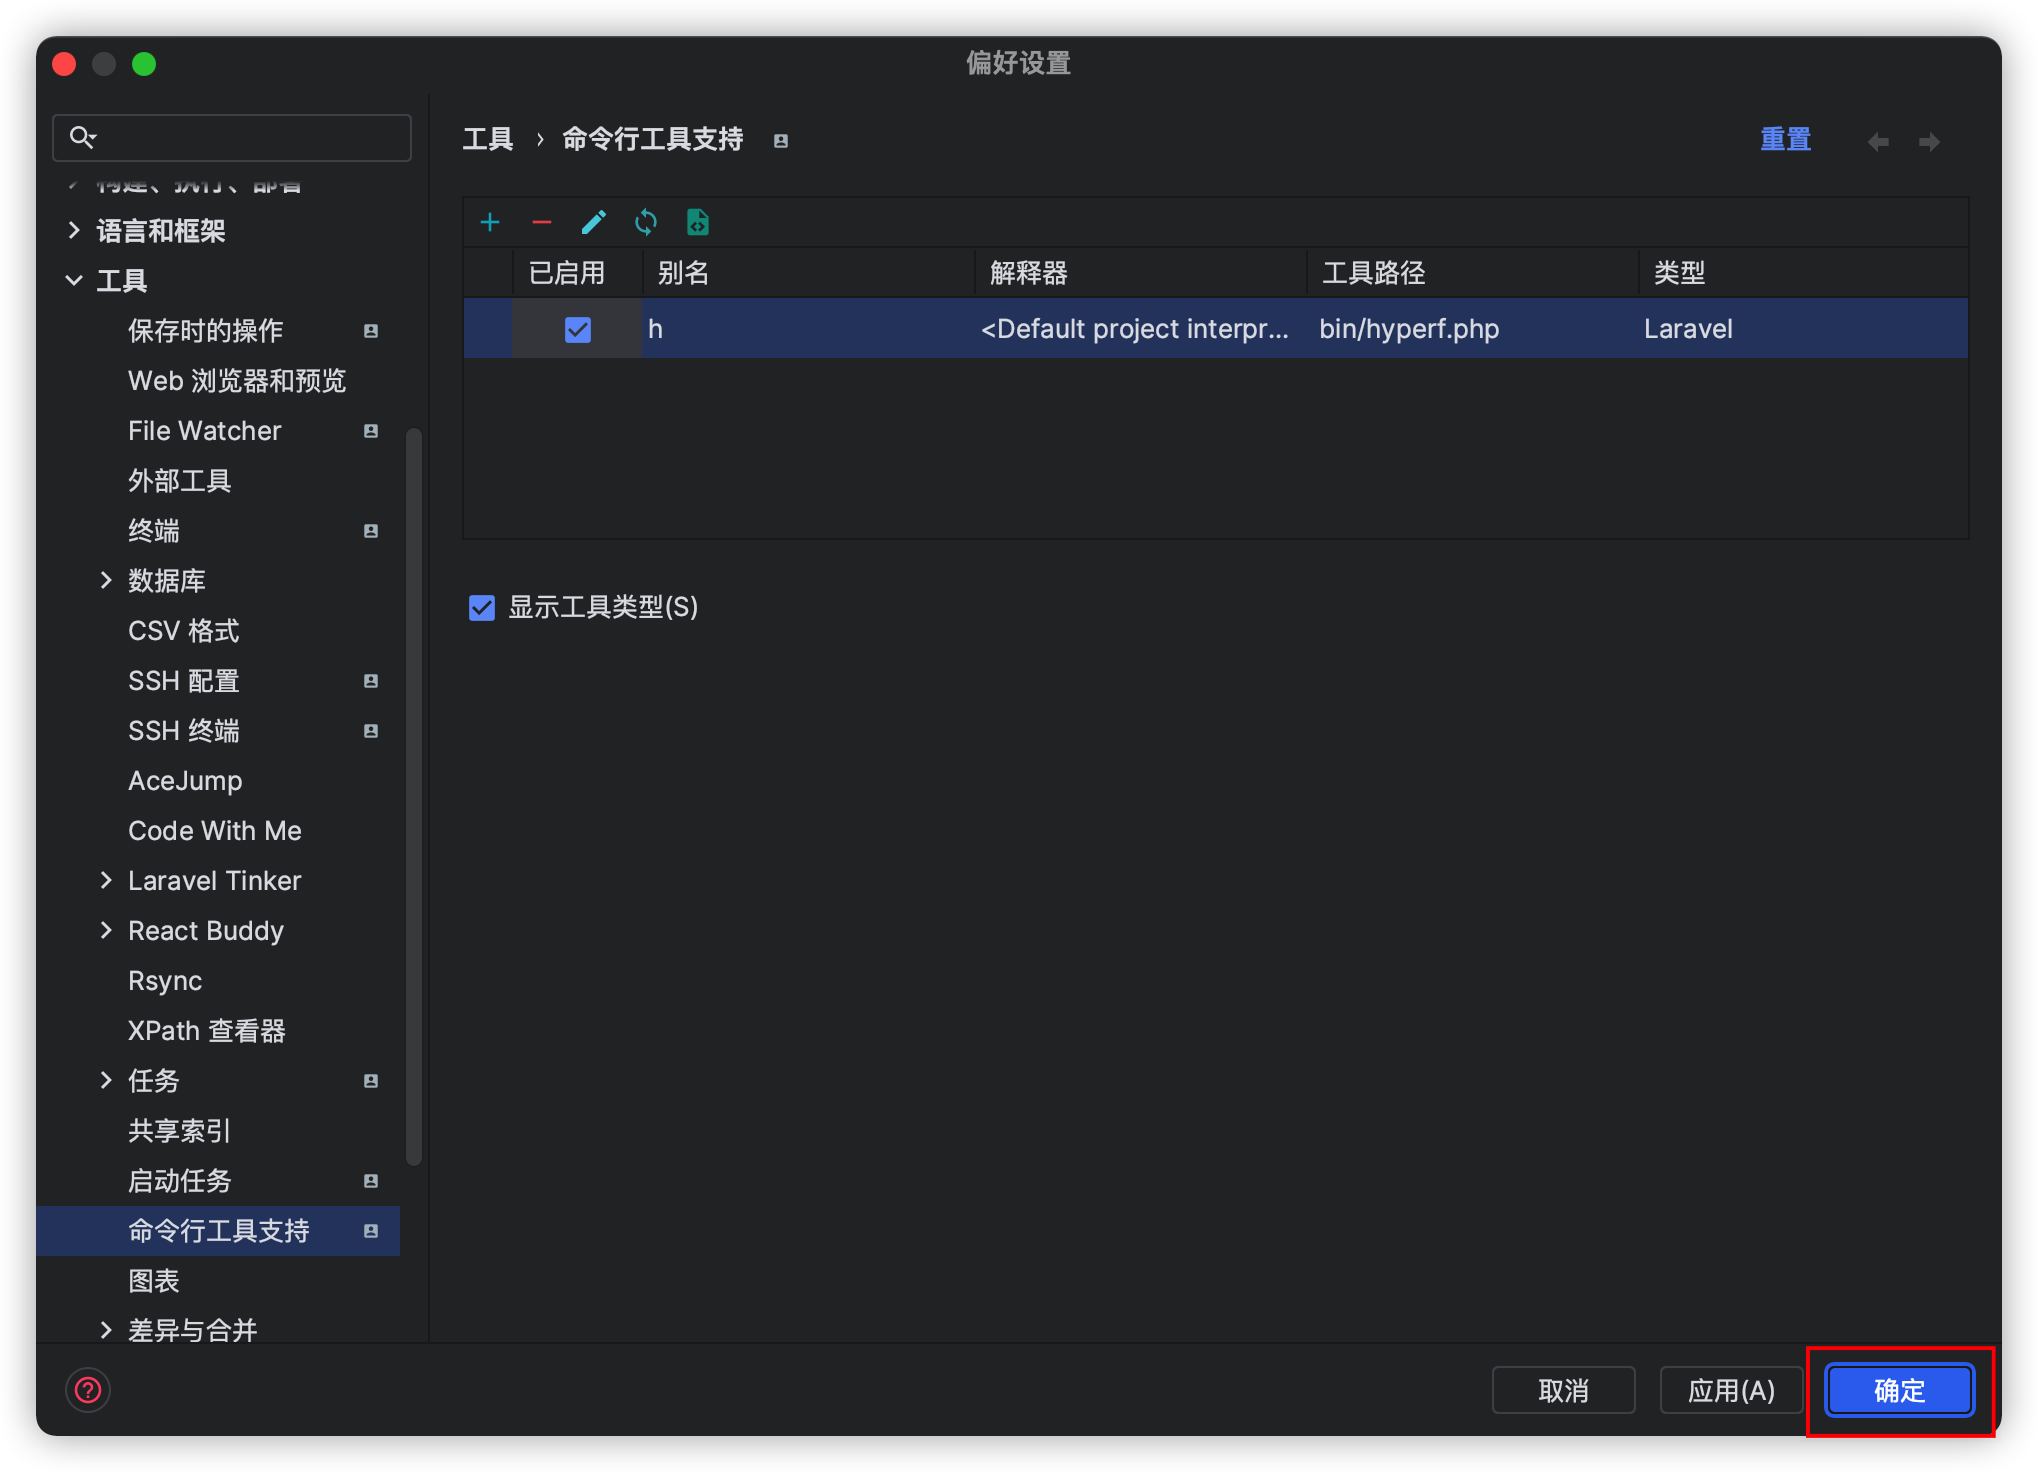 ## 使用 1. 双击 Ctrl 键唤出“运行任何内容”窗口  2. 输入相关命令如 `h d`,然后就会进行命令联想 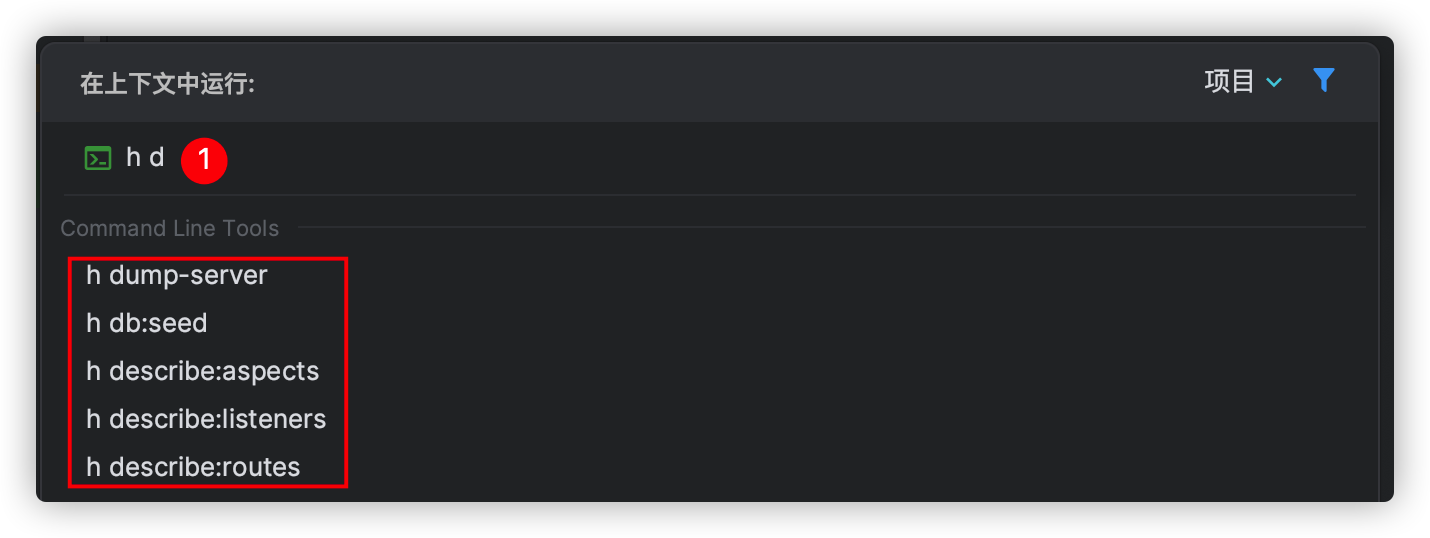 3. 选定一个命令,按回车运行 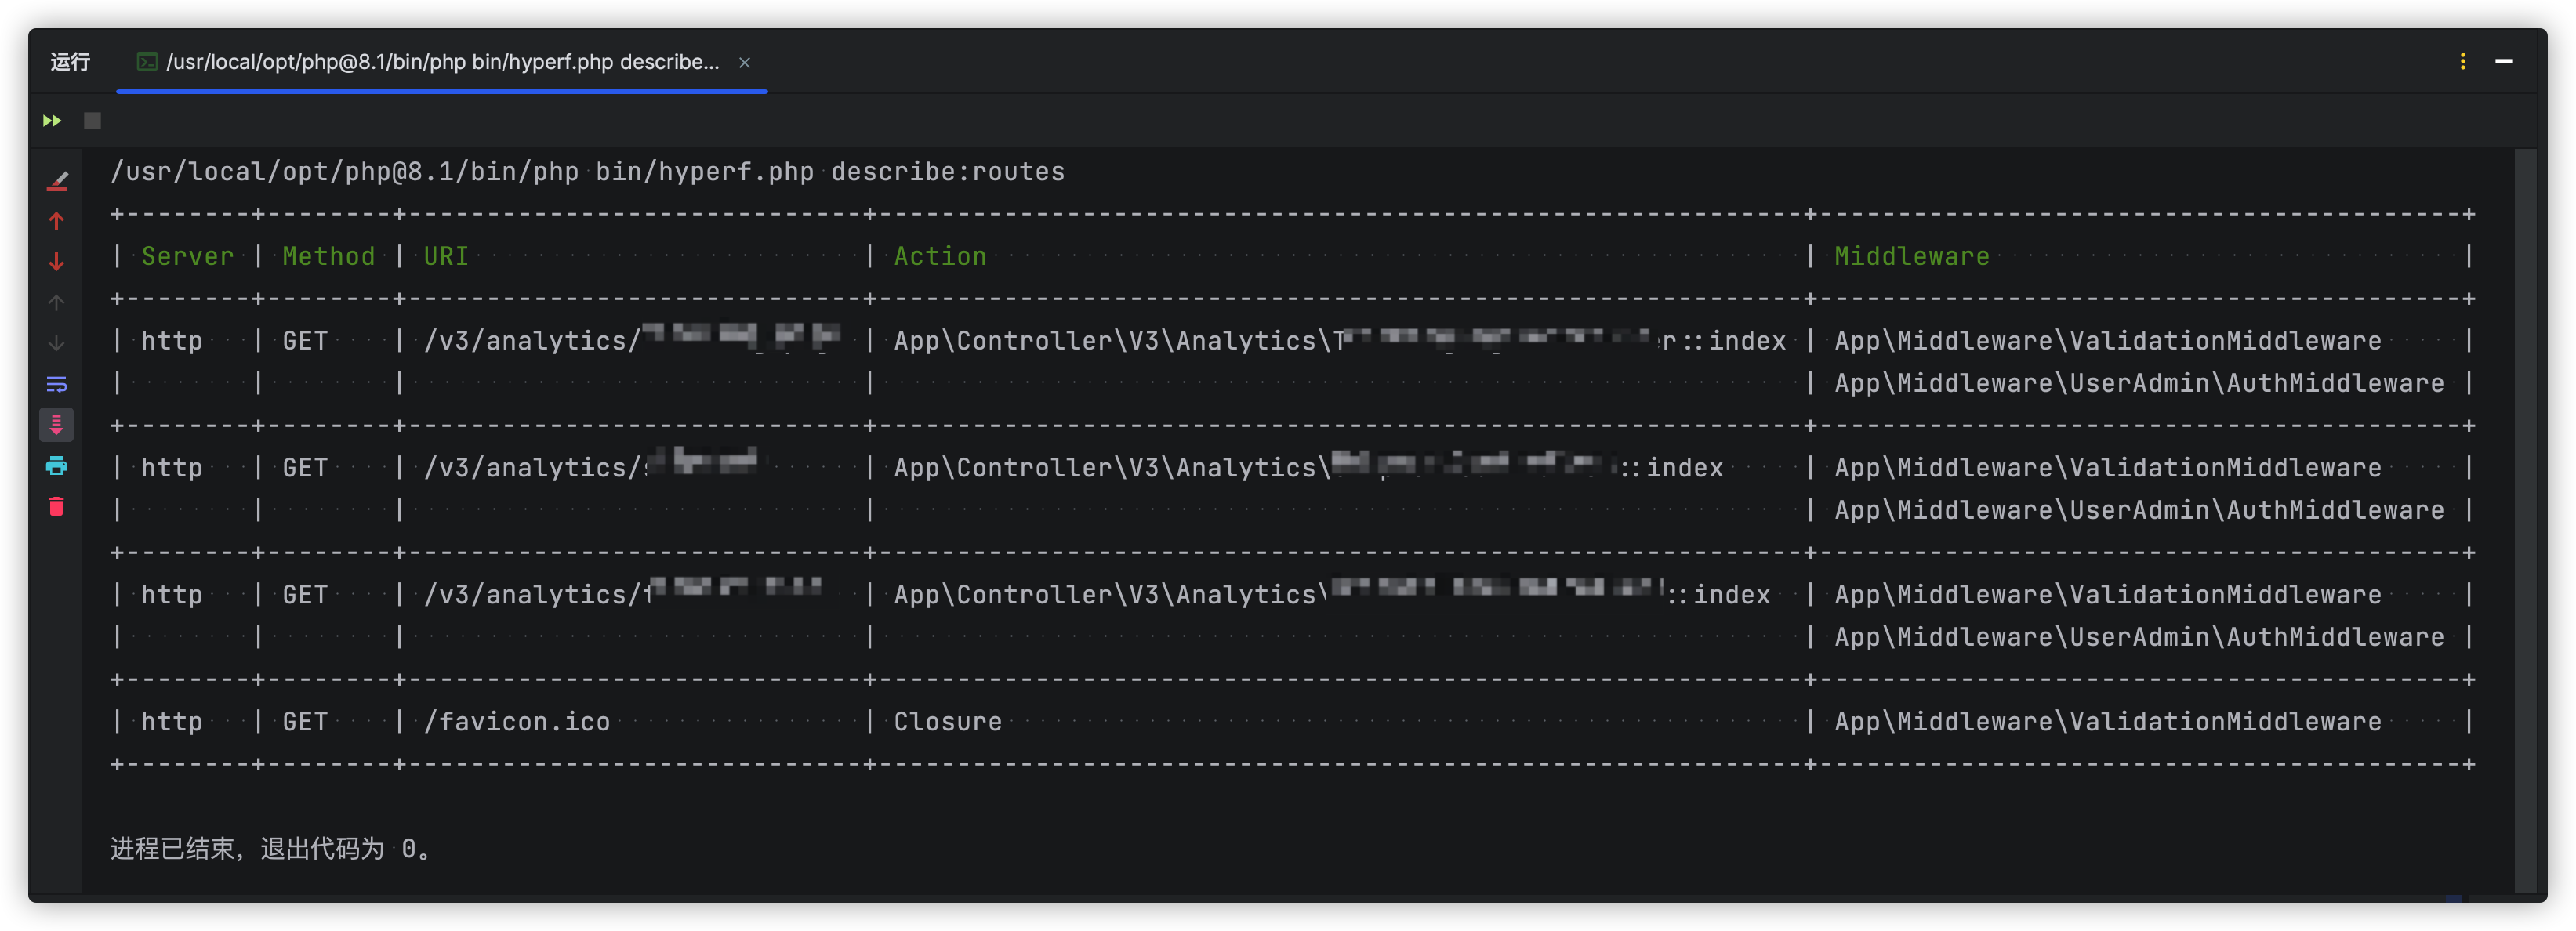
brew 设置代理 作者: Shine 时间: 2023-07-04 分类: macOS 评论 ## 1. 查找 `brew` 所在位置 一般路径都在 `/usr/local/bin/brew`,请记录好,后续需要使用 ```shell ➜ ~ which brew /usr/local/bin/brew ``` ## 2. 移动 `brew` 命令位置 ```shell mv /usr/local/bin/brew /usr/local/bin/brew_orig ``` ## 3. 新建一个如 `.proxy` 文件置代理 执行命令 `vim ~/.proxy.sh`,文件内容为: > 以下代理服务器地址根据自己实际情况调整 ```shell #!/bin/bash export https_proxy=http://127.0.0.1:7890 export http_proxy=http://127.0.0.1:7890 export all_proxy=socks5://127.0.0.1:7890 ``` ## 4. 新建 `/usr/local/bin/brew` 文件 执行命令 `vim /usr/local/bin/brew` 文件内容为: ```shell #!/bin/bash source ~/.proxy.sh /usr/local/bin/brew_orig "$@" ``` 并赋予可执行权限 `chmod +x /usr/local/bin/brew` ## 5. 测试使用 ```shell ➜ ~ cat $(which brew) #!/bin/bash source ~/.proxy.sh /usr/local/bin/brew_orig "$@" ➜ ~ brew --version Homebrew 4.0.26 Homebrew/homebrew-core (git revision 3112e690293; last commit 2022-07-12) Homebrew/homebrew-cask (git revision 2ae6e86efe; last commit 2023-02-16) ```