macOS 使用命令(networksetup)设置 PAC 代理 作者: Shine 时间: 2022-10-14 分类: macOS 因为手动在网络设置里,设置的 PAC 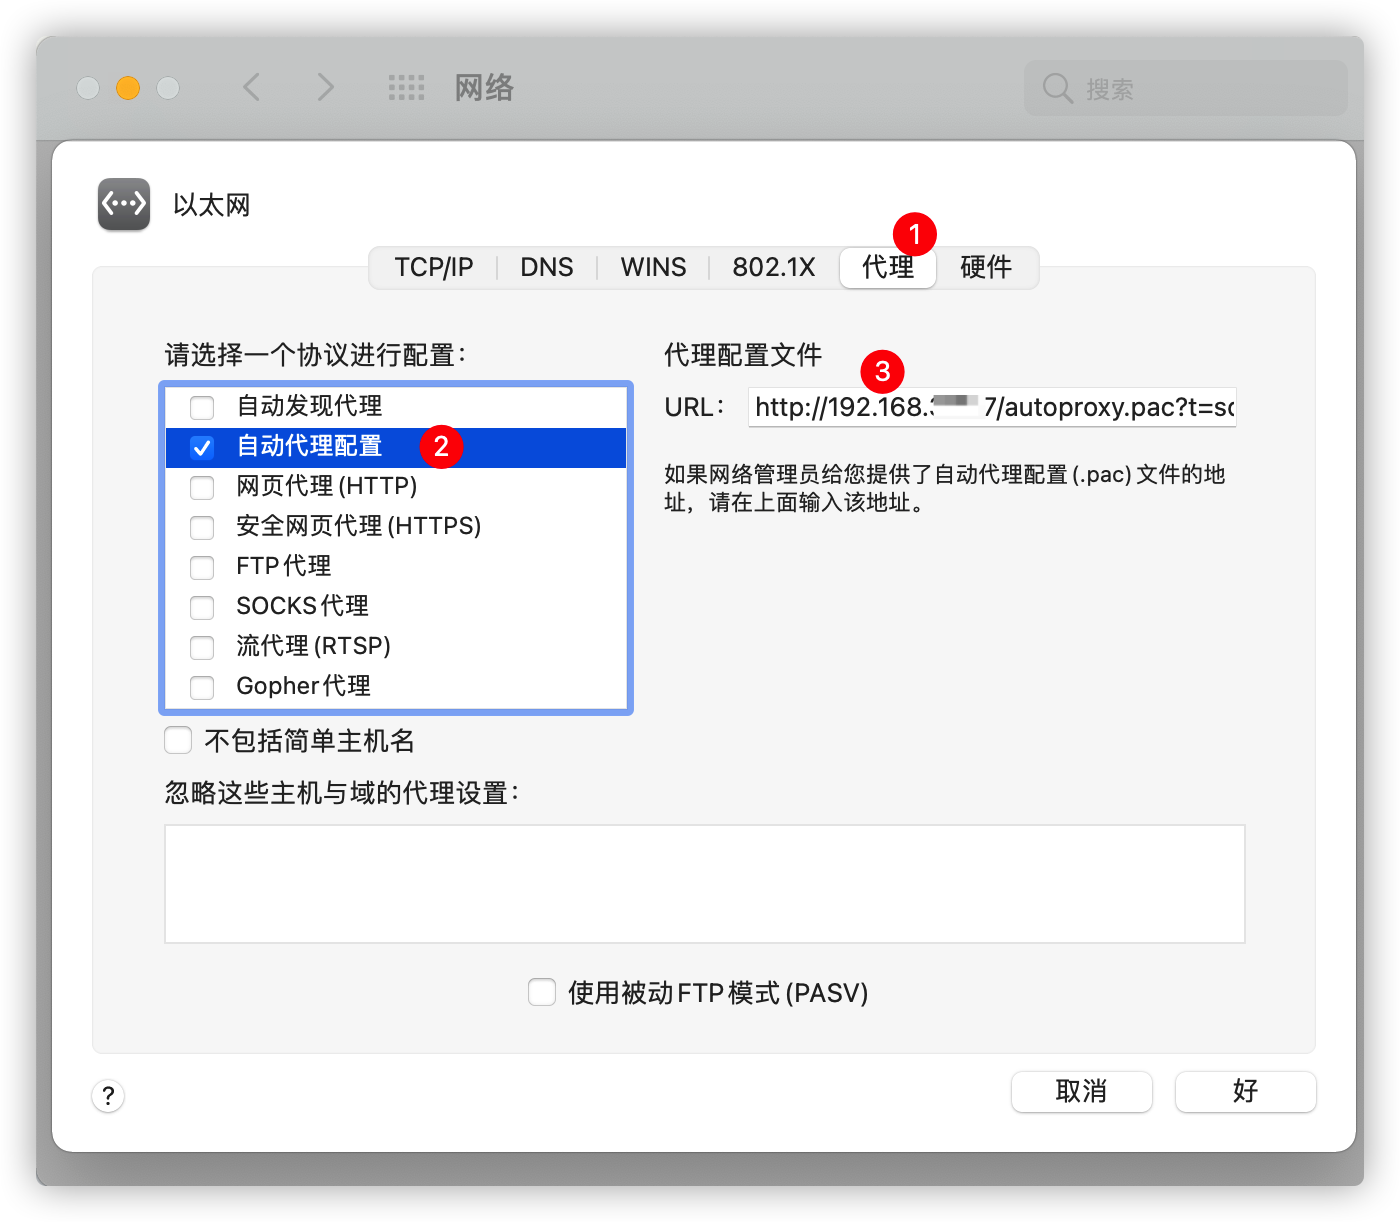 可能会因为其它软件给关掉,如 ClashX 设置为系统代理替换掉 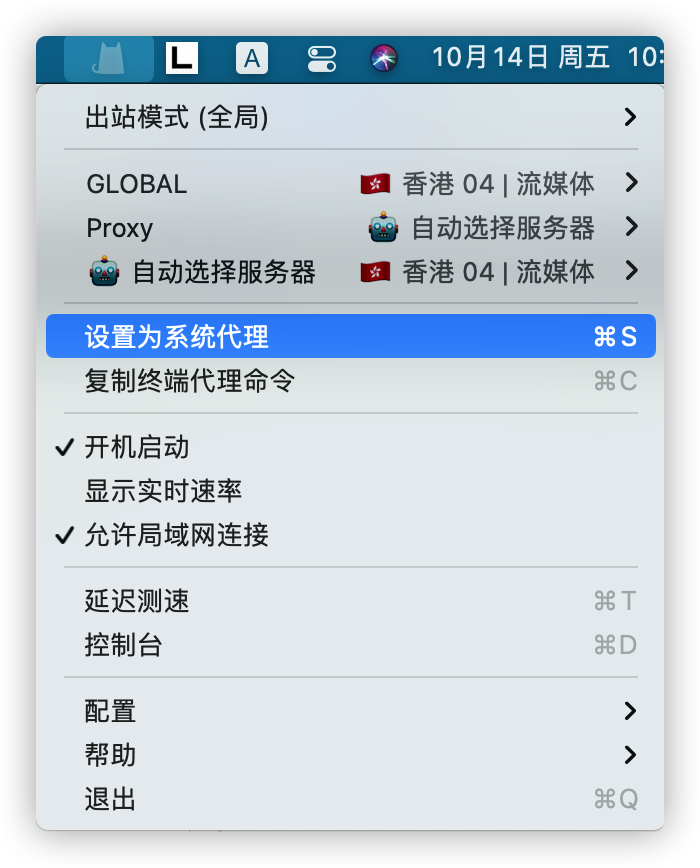 然后自己手动替换又比较麻烦,所以想着用命令去替换一下 ## 解决方案 所以在网上找到了一篇问答 [https://apple.stackexchange.com/a/166443](https://apple.stackexchange.com/a/166443 "https://apple.stackexchange.com/a/166443"),使用 `networksetup -setautoproxyurl` 命令即可 ### networksetup -setautoproxyurl 语法如下 ```shell networksetup -setautoproxyurl <network services> <pac address> ``` #### 问题 1:怎么拿到 `<network services>` ? 可以通过 `networksetup -listallnetworkservices` 命令拿到(只是猜测,因为我的是黑苹果,并且是有以太网网卡) 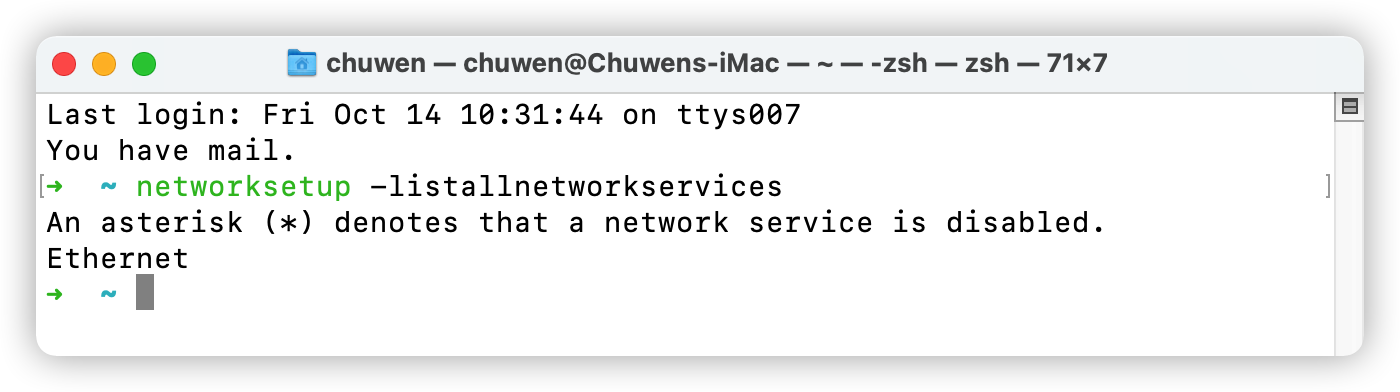 #### 示例 1 给以太网网卡设置 PAC 地址 ```shell networksetup -setautoproxyurl "Ethernet" "http://192.168.30.87/autoproxy.pac" ``` 然后检查下设置状态 : ```shell networksetup -getautoproxyurl "Ethernet" ``` 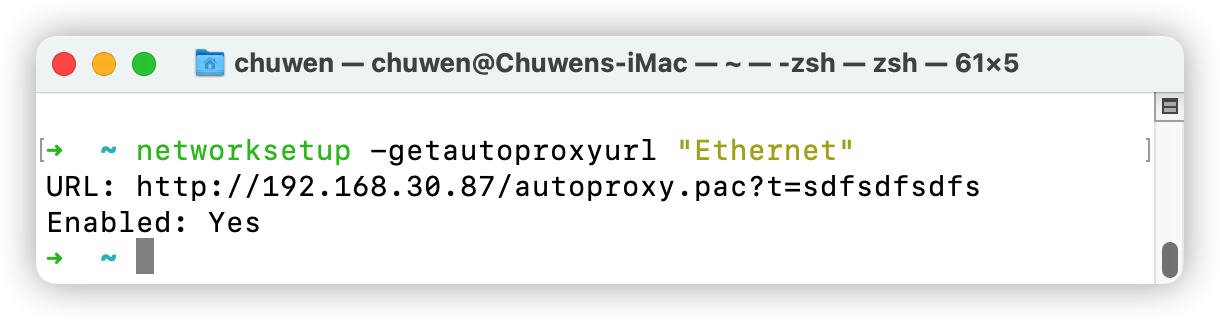 标签: macOS, CLI, networksetup